Introduction to Christmas Kitchen Sink Cookies
What are Christmas Kitchen Sink Cookies?
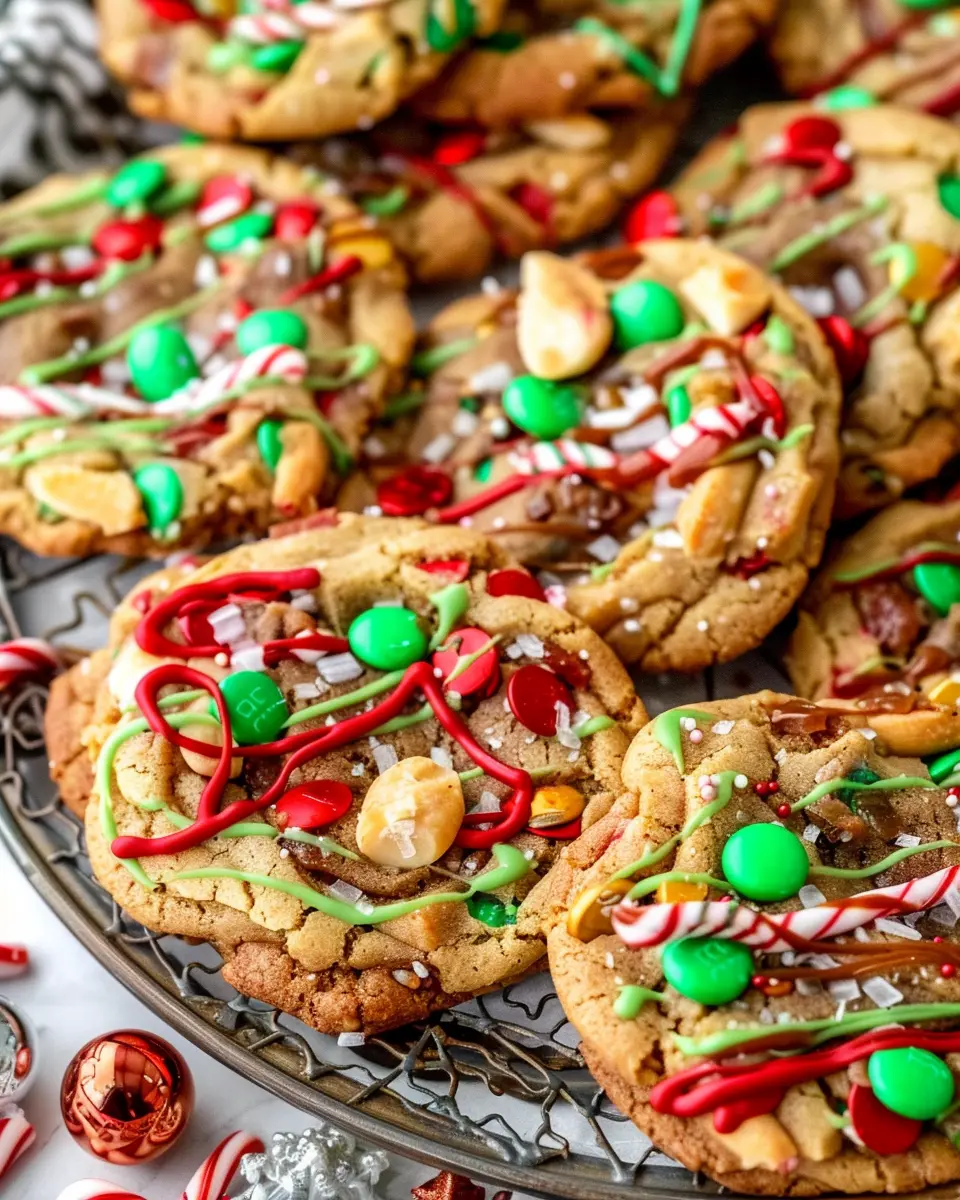
Have you ever heard of Christmas Kitchen Sink Cookies? If not, you’re in for a delightful treat—literally! These cookies are a whimsical combo of flavors and textures, bringing together chocolate chips, nuts, dried fruits, and whatever else makes your taste buds dance. It’s called “kitchen sink” because you’re tossing in everything but the kitchen sink! This festive twist on the classic cookie is a perfect way to tackle those holiday vibes while indulging in a cookie that feels like a hearty hug.
Imagine biting into a cozy, chewy cookie where sweet chocolate meets the crunch of nuts and the chewiness of dried fruits. You get an explosion of taste in every single bite! Whether you’re using leftovers from holiday baking or experimenting with new combinations, these cookies are all about creativity and fun.
Why are they perfect for the holiday season?
So, why are Christmas Kitchen Sink Cookies the star of the holiday cookie table? For starters, they are incredibly versatile. You can customize them to your heart’s content—add in Turkey Bacon bits or Chicken Ham for a savory kick, or even throw in some festive spices like cinnamon and nutmeg. Plus, they’re a fantastic way to include friends and family in the baking process, making it not just about the final product, but also about the memories created along the way.
Another reason to love these cookies during the holiday season is their ability to please everyone. With so many flavors packed in, there’s bound to be something for everyone, from chocolate lovers to those who appreciate a little fruitiness in their sweets.
So, if you’re looking to elevate your holiday baking game this year, a batch of these cookies might just be what you need. After all, who wouldn’t want to boast the most delicious batch of Christmas Kitchen Sink Cookies at the next holiday gathering? Check out more cookie inspiration on sites like Food Network or Serious Eats to feast your eyes on various takes on this delightful treat.

Ingredients for Christmas Kitchen Sink Cookies
When it comes to Christmas Kitchen Sink Cookies, having the right ingredients is key to creating these delightful treats that are perfect for the holiday season. Let’s break down what you’ll need.
Essential Ingredients
For the foundation of these cookies, you’ll want to gather:
- All-purpose flour: This will give your cookies structure.
- Baking soda and baking powder: For that perfect lift.
- Sugar: A mix of granulated and brown sugar will add sweetness and chewiness.
- Butter: Use unsalted for better control over salinity.
- Eggs: To bind everything together.
- Vanilla extract: A splash of this will enhance all those flavors.
- Chocolate chips: Semi-sweet or milk chocolate works well!
Optional Ingredients for Customization
What makes Christmas Kitchen Sink Cookies special is the flexibility to customize! Consider adding:
- Nuts: Walnuts or pecans can provide that delightful crunch.
- Dried fruits: Cranberries or raisins bring a festive touch.
- Candies: M&Ms or holiday-themed sprinkles can boost the holiday vibes.
- Spices: A pinch of cinnamon or nutmeg can warm up the flavors.
Feeling adventurous? Why not try some inspiration from culinary experts at Bon Appétit or America’s Test Kitchen for personal twists on your cookie creations!
Preparing Christmas Kitchen Sink Cookies
The holiday season calls for creativity in the kitchen, and what better way to embrace that spirit than with Christmas Kitchen Sink Cookies? These delightful treats are perfect for sharing with friends, family, or even surprising your colleagues at the office. Let’s walk through the process of making these scrumptious cookies, step by step.
Gather and Prepare Your Ingredients
First things first—before you dive into baking, it’s essential to gather all your ingredients. For Christmas Kitchen Sink Cookies, you’ll need:
- Dry ingredients: All-purpose flour, baking soda, baking powder, and a pinch of salt.
- Wet ingredients: Unsalted butter, both brown and granulated sugars, eggs, and vanilla extract.
- Mix-ins: This is where the “kitchen sink” part comes in! Consider using a mix of chocolate chips, nuts, dried fruit, and even candy canes for that festive touch.
Prep your workspace: Make sure you have a large mixing bowl, measuring cups, and spoons handy. If you’d like to read about ingredient substitutions and storage, check out this article.
Mix the Butter and Sugars
Next, you’ll want to cream together your butter and the sugars. In a large mixing bowl, beat the softened butter with both the brown and granulated sugars until the mixture is light and fluffy. This process helps to incorporate air, giving your cookies that perfectly soft texture.
If you don’t have a stand mixer, don’t worry—an electric hand mixer or even a little elbow grease will do the trick! Just remember, kicking it old-school with a wooden spoon can be satisfying, too.
Incorporate Eggs and Vanilla
Now, it’s time to add your eggs and a splash of vanilla extract to the butter and sugar mixture. You’ll want to mix this thoroughly, ensuring the eggs are fully blended. The vanilla will add a warm, aromatic essence that complements the other ingredients beautifully.
Did you know that using high-quality vanilla can really elevate your baking? For more tips on choosing the right flavor profiles, visit Culinary Compass.
Combine Dry Ingredients
In a separate bowl, whisk together your dry ingredients: flour, baking soda, baking powder, and salt. Gradually add this dry mixture to your wet ingredients. Just be careful not to overmix—this can lead to tough cookies. Mix until the flour is incorporated, and the dough starts to come together.
Fold in Mix-Ins Carefully
Now comes the fun part—folding in your mix-ins! You want to keep that lovely texture intact, so gently stir in your chocolate chips, nuts, and any other fun ingredients you’ve chosen. This is where you can get creative: how about some festive peppermint pieces or a sprinkling of dried cranberries for an added holiday touch?
Scoop and Shape the Cookies
Preheat your oven to 350°F (175°C). While it warms up, scoop your cookie dough onto a lined baking sheet. Here’s a pro tip: using a cookie scoop will help ensure all your cookies are the same size—perfect for even baking. Leave some space between each cookie, as they will spread out while baking.
Bake the Cookies
Finally, it’s time to bake your Christmas Kitchen Sink Cookies! Place the baking sheets in the oven and let them bake for about 10-12 minutes, or until the edges are golden brown. The centers might look slightly undercooked, but they’ll set as they cool. Once they’re out of the oven, allow them to rest on the baking sheets for a few minutes before transferring them to a wire rack.
And there you have it—the perfect Christmas Kitchen Sink Cookies ready for indulging! Whether enjoyed warm from the oven or shared with loved ones, these cookies are sure to bring a little extra joy to your holiday season. Happy baking!
Variations on Christmas Kitchen Sink Cookies
Nut-Free Options
If you’re looking to make Christmas Kitchen Sink Cookies that are safe for nut allergies, it’s easier than you think! Simply substitute any nuts with seeds like sunflower or pumpkin seeds. Not only do they add a delightful crunch, but they’re also packed with nutrients. As an extra bonus, this gives kids a similar texture without the worry.
Gluten-Free Adjustments
For those needing gluten-free alternatives, swaps are simple. Instead of regular flour, use a high-quality gluten-free flour blend, which you can find at most grocery stores. Many blends are designed to mimic the properties of wheat flour perfectly, ensuring your Christmas Kitchen Sink Cookies maintain their delicious chewiness. Be sure to add a teaspoon of xanthan gum if your blend doesn’t already have it; this helps with binding.
Alternative Mix-Ins for Customization
One of the best parts about Christmas Kitchen Sink Cookies is their versatility! Get creative with mix-ins! Here are a few ideas to inspire your holiday baking:
- Dried Fruits: Chopped dried cranberries, apricots, or raisins can elevate your cookies.
- Chocolates: Swap regular chocolate chips for white chocolate or even dark chocolate chunks for a more decadent bite.
- Spices: For a festive flair, consider adding cinnamon or nutmeg to your dough.
- Coconut Flakes: Shredded coconut can bring a tropical twist to your holiday treats.
With these tips, your Christmas Kitchen Sink Cookies will be a hit no matter who pops by for a visit this holiday season! For more ideas and variations, you might find this article on Baking Substitutes helpful. Happy baking!
Baking notes for Christmas Kitchen Sink Cookies
Tips for achieving the perfect texture
When it comes to your Christmas Kitchen Sink Cookies, achieving that delightful chewy yet slightly crispy texture is key. Here are some tips for success:
- Butter Temperature: Start with softened butter; this helps in mixing ingredients uniformly. Room temperature is ideal—think creamy, not melted!
- Chill the Dough: Let your dough chill for at least 30 minutes before baking. Chilling helps the cookies maintain their shape and enhances flavor.
- Don’t Overbake: Keep an eye on your cookies; they should be a light golden color. Remember, they’ll continue to cook slightly after you pull them from the oven!
Storing and reheating cookies
To keep your Christmas Kitchen Sink Cookies fresh, store them in an airtight container at room temperature. They’re best enjoyed within a week but can be frozen for up to three months.
When you’re ready to indulge, simply pop them in the microwave for 10-15 seconds or enjoy them as is for that perfect bite! Want to learn more about proper cookie storage? Check out The Scoop on Cookie Storage.
With these baking notes, you’re on your way to creating a festive treat that will impress friends and family alike!

Serving suggestions for Christmas Kitchen Sink Cookies
How to present them for holiday gatherings
When it comes to serving your Christmas Kitchen Sink Cookies, presentation can elevate the festive spirit. Consider arranging these delightful treats on a large, decorative platter, perhaps with a sprinkle of powdered sugar for that snowy effect. Adding some edible decorations, like red and green sprinkles or seasonal candy canes, creates visual interest and a pop of color.
For an added touch, you could wrap a small stack of cookies in clear cellophane tied with a cheerful ribbon. This not only makes them easy to grab but also adds a personal, homemade feel to your holiday gatherings. Plus, who doesn’t love a lovely gift of cookies during the festive season?
Pairing ideas with beverages
Pairing your Christmas Kitchen Sink Cookies with the right beverages can enhance everyone’s tasting experience. For a warm treat, serving these cookies alongside hot chocolate topped with whipped cream or marshmallows is a classic choice that comforts.
Alternatively, a refreshing glass of spiced apple cider or an antioxidant-rich berry smoothie works wonderfully, too. These options balance the sweetness of the cookies and create a delightful flavor harmony that your guests will love. If you’re looking for something a bit more adventurous, consider serving them with a festive herbal tea blend—think peppermint or chamomile with a hint of cinnamon for those cozy winter vibes.
Explore some popular beverage recipes for your holiday gatherings to boost your kitchen creativity!
Tips for Making Perfect Christmas Kitchen Sink Cookies
Baking Christmas Kitchen Sink Cookies can quickly become a treasured holiday tradition if done right. Here are some tips to ensure your cookies turn out perfectly every time.
Key Tricks for Optimal Results
- Choose Quality Ingredients: The richness of your cookies depends greatly on the ingredients you select. Use high-quality chocolate chips, nuts, and dried fruits for maximum flavor.
- Chill the Dough: Allowing your dough to chill for at least 30 minutes before baking helps prevent spreading and ensures a thicker cookie with a chewy center. This is crucial for achieving that perfect texture.
- Don’t Overmix the Dough: When combining dry and wet ingredients, mix just until incorporated. Overmixing can result in tough cookies that lose that tender, melt-in-your-mouth quality.
Common Mistakes to Avoid
- Skipping the Measuring: Accurately measuring your ingredients is vital. Even a slight imbalance can lead to disappointing results. For instance, check out these baking measurement tips for accurate conversions.
- Not Preheating the Oven: Always preheat your oven! Baking cookies in an unheated oven can lead to uneven baking.
- Ignoring Baking Time: Keep a close eye on your cookies; they should be golden brown on the edges but soft in the center. Pulling them out too late may result in hard cookies, while pulling them too early will lead to doughy centers.
By incorporating these tips, your Christmas Kitchen Sink Cookies will not only taste delicious but also create an inviting aroma that fills your home with holiday cheer!
Time details for Christmas Kitchen Sink Cookies
When you’re craving a festive treat, knowing the time commitment helps you plan your holiday baking. Here’s a quick rundown for making your Christmas Kitchen Sink Cookies.
Preparation time
Expect to spend about 20 minutes gathering your ingredients and mixing everything together. It’s a great way to sneak in some holiday tunes and get into the spirit of the season!
Baking time
The baking process will take around 12-15 minutes. Keep an eye on them; you want that perfect golden-brown edge!
Total time
In total, you’re looking at approximately 35-40 minutes from start to finish. Perfect for a quick baking session that yields delightful, crowd-pleasing cookies.
For more tips on delicious holiday recipes, check out this guide to elevate your festive cooking!
Nutritional Information for Christmas Kitchen Sink Cookies
When indulging in festive treats like Christmas Kitchen Sink Cookies, it’s helpful to know what you’re munching on. Here’s a breakdown of the nutritional information:
Calories
Each cookie contains approximately 150 calories. This makes them a delightful yet manageable indulgence during the holiday season.
Protein
The Christmas Kitchen Sink Cookies pack about 2 grams of protein per cookie, thanks to ingredients like nuts and chocolate. This helps keep you feeling satisfied without overdoing it on sugar.
Sodium
With around 80 mg of sodium, these cookies offer a savory touch without tipping into salty territory. Remember, moderation is key, especially if you’re watching your sodium intake.
Curious about healthy baking alternatives? Check out this guide from Healthline for more ideas. Who knew holiday cookies could be both delicious and mindful?
FAQs about Christmas Kitchen Sink Cookies
Can I substitute ingredients in the recipe?
Absolutely! One of the beautiful things about Christmas Kitchen Sink Cookies is their versatility. If you’re low on certain ingredients or have dietary restrictions, you can easily make substitutions. For example, feel free to swap out chocolate chips for dried cranberries or add some chopped nuts if you prefer a bit of crunch. If you want a nut-free option, you can switch to sunflower seed butter in place of traditional butter. Just remember that each substitution may alter the texture or flavor slightly, but that’s part of the fun—experimenting in the kitchen!
How do I know when the cookies are done?
Timing is key, but there’s no need to stress! You’ll want to bake your Christmas Kitchen Sink Cookies until they’re lightly golden around the edges, while still soft in the center. They will continue to cook a bit after they’re out of the oven, so don’t wait until they’re overly brown. Typically, about 10-12 minutes at 350°F will do the trick, but keep an eye on them, as ovens can vary. The scent of warm cookies wafting through the air? That’s your best cue!
What’s the best way to store these cookies?
For optimal freshness, store your Christmas Kitchen Sink Cookies in an airtight container at room temperature. They should stay delicious for up to a week, though let’s be honest—these cookies might not last that long! If you want to preserve them even longer, consider freezing the cookies in a single layer, then transferring them to a freezer bag. They can last up to three months, making them perfect for future festive cravings or surprise guests. For further tips on cookie storage, you can check out resources like The Cookie Connoisseur.
Remember, the joy of baking is all about sharing—so enjoy your cookies, and may your holiday season be sweet!
Conclusion on Christmas Kitchen Sink Cookies
Why these cookies are a must-try this holiday season
Christmas Kitchen Sink Cookies bring a delightful twist to your holiday baking, making them a must-try for anyone looking to impress friends and family. Not only do they combine a variety of flavors—from sweet chocolate chips to salty snacks—but they also encourage creativity in the kitchen. Perhaps you have leftover Turkey Bacon or Chicken Ham? Toss them in!
These cookies are not just tasty; they also embody the spirit of the season by uniting everyone through shared experiences of making and enjoying treats. So, this holiday season, make Christmas Kitchen Sink Cookies your go-to recipe. Your taste buds will thank you!
For more baking inspiration, check out this fantastic guide. Happy baking!
PrintChristmas Kitchen Sink Cookies: The Best Festive Treat You’ll Bake

Delight in the festive flavors of Christmas with these Kitchen Sink Cookies, packed with various ingredients for a delicious treat!
- Prep Time: 20 minutes
- Cook Time: 12 minutes
- Total Time: 32 minutes
- Yield: 24 cookies
- Category: Dessert
- Method: Baking
- Cuisine: American
- Diet: Vegetarian
Ingredients
- 1 cup unsalted butter
- 1 cup brown sugar
- 1 cup granulated sugar
- 2 large eggs
- 1 teaspoon vanilla extract
- 3 cups all-purpose flour
- 1 teaspoon baking soda
- 1 teaspoon salt
- 2 cups mixed chocolate chips
- 1 cup butterscotch chips
- 1 cup crushed nuts
- 1 cup dried fruit
- 1 cup oats
Instructions
- Preheat your oven to 350°F (175°C).
- In a large bowl, cream together the butter and sugars until smooth.
- Beat in the eggs one at a time, then stir in the vanilla.
- Combine the flour, baking soda, and salt; stir into the creamed mixture.
- Fold in the chocolate chips, butterscotch chips, nuts, dried fruit, and oats.
- Drop by rounded spoonfuls onto ungreased cookie sheets.
- Bake for 10-12 minutes or until edges are golden brown.
- Let cool on cookie sheets for a few minutes before transferring to wire racks.
Notes
- For extra flavor, consider adding a pinch of cinnamon to the dough.
- Chill the dough for an hour before baking for a more flavorful cookie.
Nutrition
- Serving Size: 1 cookie
- Calories: 150
- Sugar: 10g
- Sodium: 150mg
- Fat: 8g
- Saturated Fat: 4g
- Unsaturated Fat: 3g
- Trans Fat: 0g
- Carbohydrates: 20g
- Fiber: 1g
- Protein: 2g
- Cholesterol: 30mg