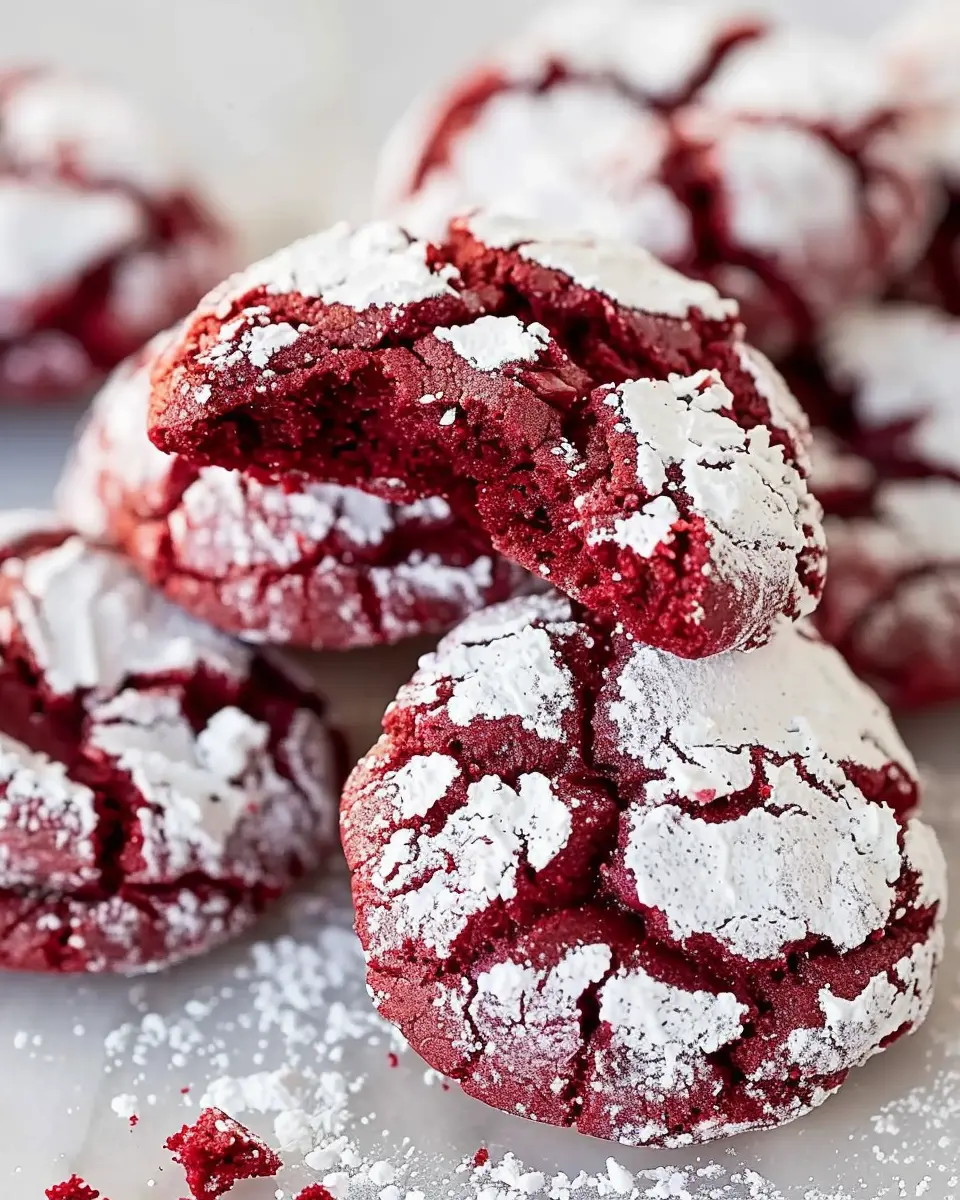
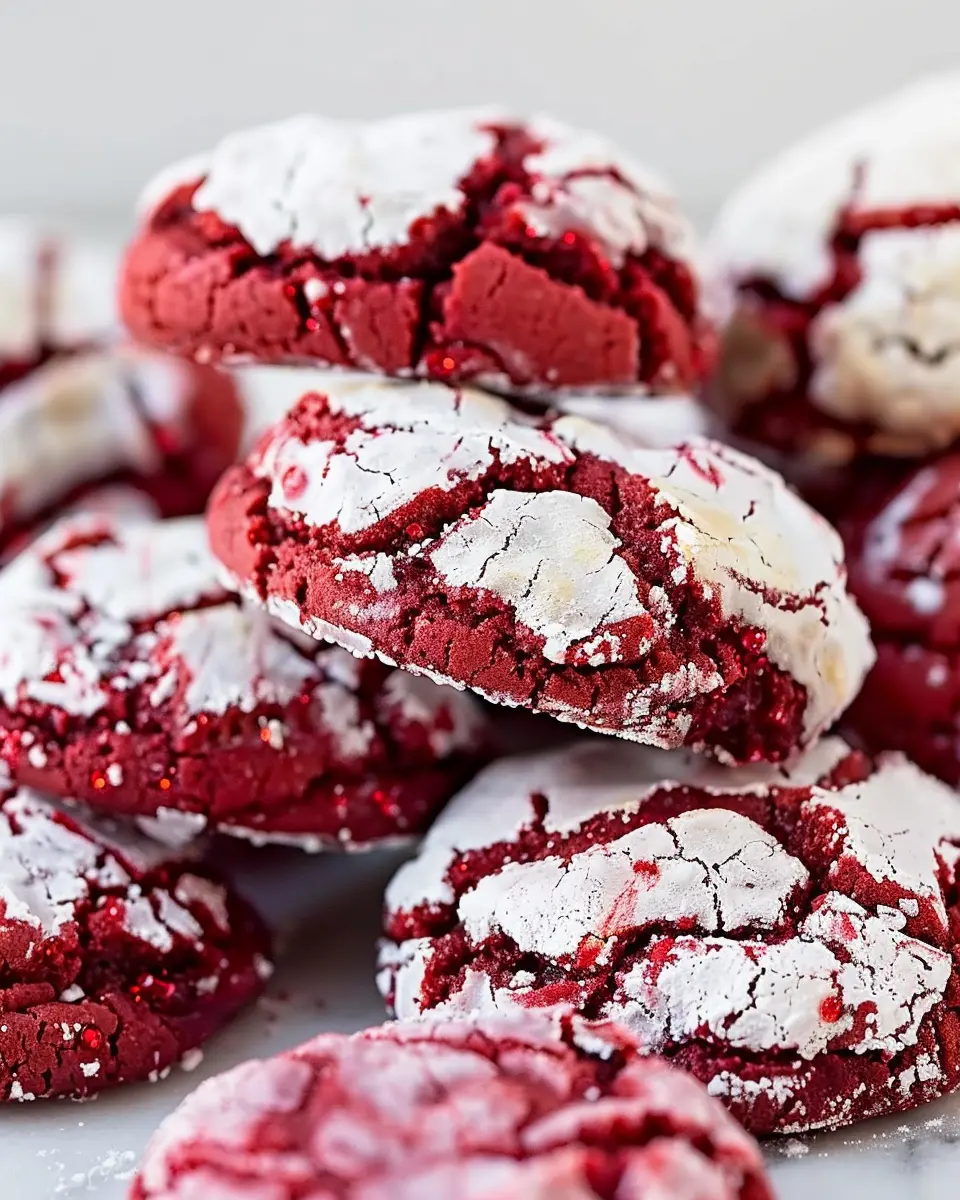
Introduction to Red Velvet Crinkle Cookies
When you think about delightful treats that brighten up your day, red velvet crinkle cookies should be at the top of your list. Imagine a cookie that merges the rich, luscious flavor of traditional red velvet cake with the fun, chewy texture of a classic crinkle cookie. This sweet creation has gained popularity not just for its taste but also for its eye-catching appearance, making them perfect for everything from casual gatherings to festive celebrations. Each bite offers a delightful contrast of soft, cake-like insides and a slightly crisp exterior, finished off with a dusting of powdered sugar that takes the visual appeal up a notch.
What Makes Red Velvet Crinkle Cookies So Irresistible?
You might be wondering, what sets these cookies apart from others? First off, red velvet crinkle cookies come with a hint of cocoa, which adds depth to their flavor profile. This is no ordinary cookie; they’re like little pieces of joy that remind us of special occasions, like birthdays or holidays. The vibrant red color also infuses a sense of merriment, making them a favorite both for gifting and indulgence.
In addition to their unique flavor, these cookies are incredibly easy to make! With just a handful of ingredients, you can whip them up with your friends on a cozy weekend. A little bit of baking powder, cocoa powder, and softened butter go a long way in creating this magical treat. Not to mention, the experience of rolling the dough balls in powdered sugar adds a fun, tactile element that can turn any baking session into a memorable activity.
If you’re looking to impress your colleagues or simply treat yourself after a long week, look no further. These cookies are the kind of recipe that not only nourishes your sweet tooth but also provides a creative outlet.
Now, are you ready to dive into the world of red velvet crinkle cookies? Grab your apron, and let’s get baking! For more baking tips and tricks, check out this article from Taste of Home for inspiration.
Ingredients for Red Velvet Crinkle Cookies
If you’re ready to whip up a batch of delightful red velvet crinkle cookies, gather your ingredients and let’s get started! These cookies will not only satisfy your sweet tooth but also turn heads with their stunning appearance. Here’s what you’ll need:
Essential Ingredients
- All-Purpose Flour: About 2 cups will give your cookies that perfect chewy texture.
- Cocoa Powder: Unsweetened cocoa powder, around 2 tablespoons, enhances the rich chocolate flavor of the cookies.
- Baking Powder: You’ll need 1 teaspoon to help these delightful treats rise beautifully.
- Vegetable Oil: Approximately 1 cup adds moisture and richness.
- Granulated Sugar: About 1.5 cups provides sweetness and a lovely texture.
- Eggs: Two large eggs will bind everything together and contribute to the cookie’s structure.
- Red Food Coloring: Using a bottle of red food coloring is crucial for that iconic red hue.
- Vanilla Extract: One teaspoon of vanilla adds a warm, aromatic touch.
- Powdered Sugar: For rolling the cookies and creating the crinkle effect.
These ingredients are not just standard; they are the backbone of what makes red velvet crinkle cookies irresistibly good. As you mix them together, you’ll feel the excitement building—trust me, it’s worth it! For further inspiration, check out resources like the Food Network for more tips on baking. Now, let’s dive into the next steps!
Preparing Red Velvet Crinkle Cookies
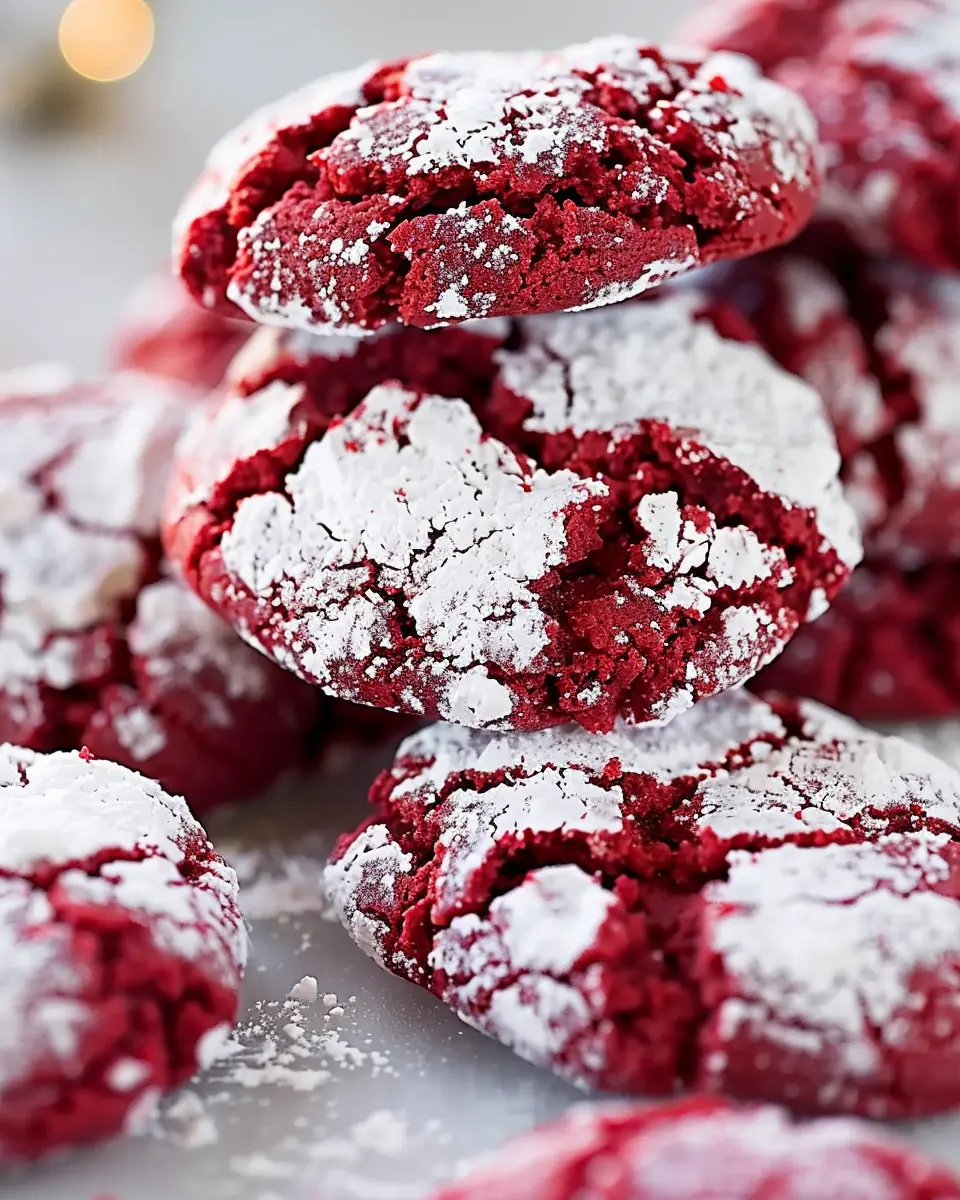
If you’re ready to indulge in a delightful twist on the classic cookie, red velvet crinkle cookies are not just a treat for the eyes but also a delight for your taste buds. Their vibrant color and rich flavor make them a must-try in any baking lineup. Let’s roll up our sleeves and dive into the step-by-step process of creating these beautiful cookies!
Combine the dry ingredients
The first step to making your red velvet crinkle cookies is to gather your dry ingredients. This is crucial as it ensures that every bite has a perfect texture and flavor. You’ll need:
- 2 cups all-purpose flour
- 2 tablespoons cocoa powder (preferably unsweetened)
- 1 teaspoon baking powder
- 1/2 teaspoon baking soda
- A pinch of salt
In a medium bowl, whisk together the flour, cocoa powder, baking powder, baking soda, and salt. Whisking thoroughly helps to aerate the ingredients while evenly disseminating the baking powder and soda, helping the cookies rise nicely when baked. If you want tips on the science behind baking, check out this fantastic guide from King Arthur Baking.
Cream the butter and sugar
Next, you’ll want to cream together your butter and sugar. This step is vital for creating that light and airy texture we all love in cookies. In a large bowl, beat together:
- 1/2 cup unsalted butter, softened
- 1 cup granulated sugar
Use a hand mixer or stand mixer on medium speed for about 3-5 minutes until the mixture is light and fluffy. It’s important to let your butter soften at room temperature as this helps in achieving that creamy texture. Plus, soft butter incorporates air more easily, which is essential for fluffy cookies!
Add the wet ingredients
Now it’s time to elevate those flavors. To your creamed mixture, add:
- 1 large egg
- 1 teaspoon vanilla extract
- 2 tablespoons red food coloring (gel works best)
Mix these ingredients until they are well combined. The addition of red food coloring gives your red velvet crinkle cookies their signature hue, so don’t be shy—feel free to add more for a deeper color!
Mix in the dry ingredients
Once the wet ingredients are fully combined, gradually add your dry mixture to the wet mixture. It’s best to do this in two or three parts to prevent overwhelming the batter. Mix just until combined; over-mixing can produce tougher cookies. You want a soft and slightly sticky dough.
Chill the dough
Chilling the dough is a vital step that shouldn’t be skipped! Wrap the dough in plastic wrap and place it in the refrigerator for at least 30 minutes. This rest time helps the flavors meld and makes the dough easier to handle. Plus, it firms up the dough, which leads to thicker cookies that will hold their shape well when baked.
Form and coat the cookies
Once your dough has chilled, preheat your oven to 350°F (175°C). In a small bowl, pour in about 1/2 cup of powdered sugar for coating. Using a cookie scoop, form balls of dough (around 1-2 tablespoons) and roll them individually in the powdered sugar until fully coated. The coating creates that delightful crinkle effect when baked!
Bake the cookies
Place the cookie dough balls on a parchment-lined baking sheet, ensuring they have enough space to spread. Bake for 10-12 minutes, or until the edges are set but the centers remain soft. You’ll know they’re done when they begin to crack on top, showcasing that classic crinkle effect. Once out of the oven, allow the baked cookies to cool on the sheet for a few minutes before transferring them to a wire rack to cool completely.
And there you have it! A step-by-step guide to making red velvet crinkle cookies. Enjoy sharing these beauties with friends or tuck a few away just for yourself, because let’s be honest, you deserve it! Happy baking!
Variations on Red Velvet Crinkle Cookies
When it comes to red velvet crinkle cookies, there’s plenty of room for creativity! Here are a couple of delightful variations that can give your cookies a unique twist while still delivering that rich flavor everyone loves.
Red Velvet Crinkle Cookies with Cream Cheese Filling
Why stop at just a great cookie when you can turn it into an indulgent treat? Adding a cream cheese filling elevates your red velvet crinkle cookies to a whole new level. Here’s how you can do it:
- Prepare your cookie dough as usual, letting it chill for the recommended time.
- In a separate bowl, mix softened cream cheese with a bit of powdered sugar and vanilla extract. This creates a deliciously sweet filling.
- Roll the cookie dough into balls, then flatten them slightly and place a dollop of cream cheese mixture inside before sealing them up.
- After baking, you’ll have chewy cookies that surprise with a creamy center, making every bite absolutely heavenly!
This combination is not only delicious but also visually appealing—just imagine the vibrant red cookie contrasting with the white filling!
Gluten-Free Red Velvet Crinkle Cookies
For those with gluten sensitivities, you can still enjoy red velvet crinkle cookies without sacrificing flavor or texture. Here’s a quick and easy approach:
- Substitute all-purpose flour with a gluten-free flour blend. Make sure to choose a blend that contains xanthan gum for the best results.
- Keep an eye on your baking time; gluten-free flour can sometimes alter how quickly cookies bake.
Using gluten-free flour doesn’t mean compromising on taste! These cookies will be just as delicious, soft, and crinkly as their traditional counterparts. For more on gluten-free baking, resources like the Gluten Intolerance Group can help guide you.
By trying out these variations, you can cater to different taste buds and dietary needs while keeping the spirit of red velvet crinkle cookies alive and well!
Baking Tips for Red Velvet Crinkle Cookies
Creating the perfect red velvet crinkle cookies can be a delightful adventure! Here are some friendly tips to ensure your baking experience is both fun and rewarding.
Getting the Perfect Red Color
To achieve that iconic vibrant red, use quality red food coloring. Gel food coloring works best, as it doesn’t add extra moisture to your dough. A common mistake is using too little coloring, so don’t be shy!
Mixing Tips for Chewy Texture
For that irresistible chewy texture, cream your butter and sugars well. This process incorporates air, which helps your cookies puff up. Don’t rush it — about 3-5 minutes should do the trick.
Chilling is Key
After mixing the dough, refrigerate for at least 30 minutes. Chilling not only enhances the flavors but also helps the cookies maintain their shape while baking.
Baking and Monitoring
Keep an eye on your red velvet crinkle cookies towards the end of the baking time. They should have a gently puffed appearance and cracked tops.
Feel free to experiment with different fillings or toppings, and don’t forget to share your creations! For more baking tips, consider checking out resources like The Kitchn or Serious Eats. Happy baking!
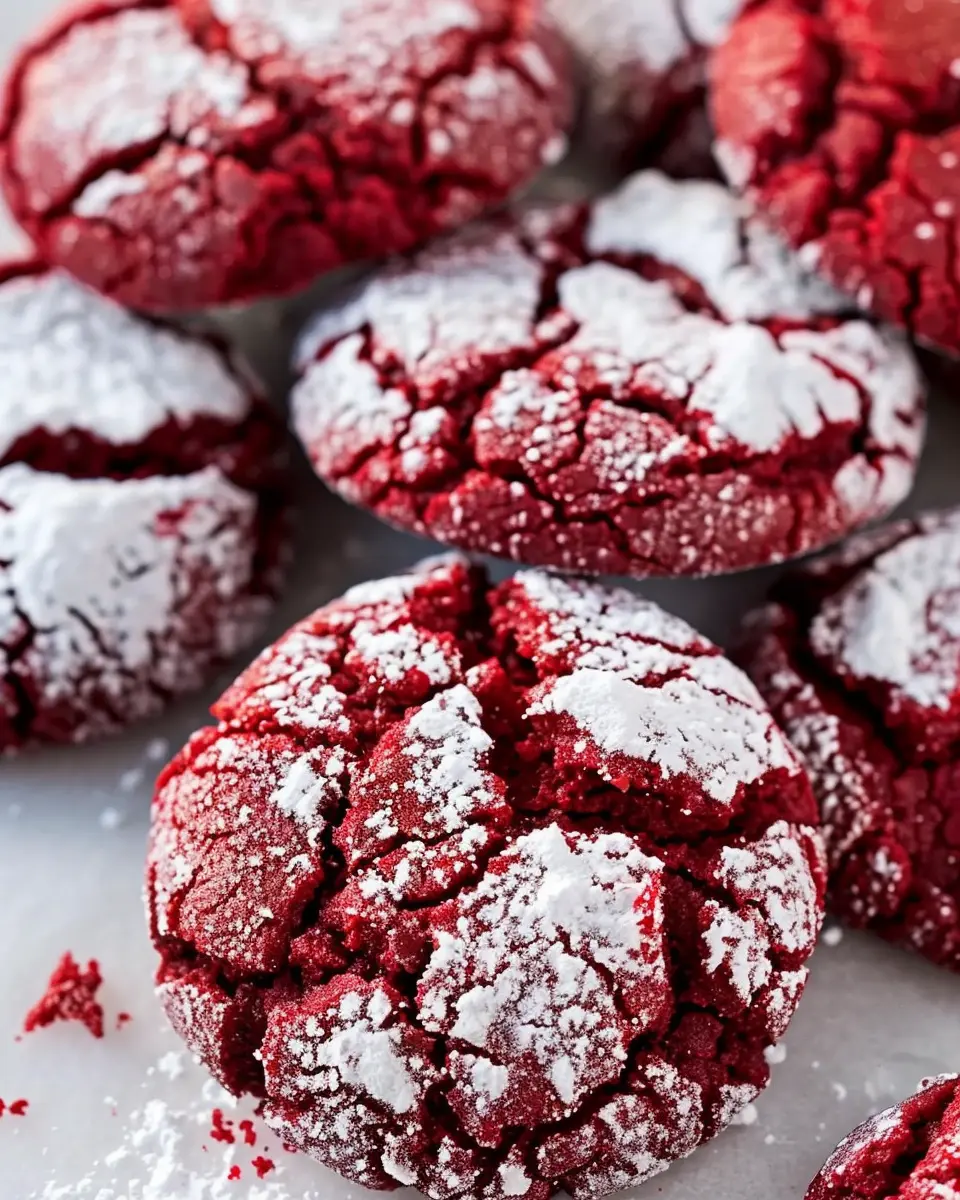
Serving suggestions for Red Velvet Crinkle Cookies
When it comes to red velvet crinkle cookies, the serving possibilities are delightfully endless! These cookies, known for their beautiful crimson hue and velvety texture, can elevate any gathering or cozy night in. Here are some thoughtful serving suggestions to take your cookie experience to the next level:
Pairing with Beverages
- Milk: A classic choice! The creamy texture of milk complements the rich flavors of chocolate in the cookies.
- Coffee: Try serving these cookies with a warm cup of your favorite brew. The slight bitterness of coffee beautifully balances the sweetness.
- Herbal Tea: For a lighter option, enjoy your cookies with a soothing cup of chamomile or peppermint tea.
Presentation Matters
- Cookie Jar: Display your red velvet crinkle cookies in a decorative cookie jar for an inviting touch in your kitchen or at a party.
- Platter Arrangement: Serve them on a stunning platter with a dusting of powdered sugar or cocoa powder, making them visually appealing.
Add-Ons
- Ice Cream Sandwiches: Create an indulgent dessert by sandwiching a scoop of vanilla or cream cheese ice cream between two cookies.
- Festive Sprinkles: During holidays, add some red and white sprinkles on top to enhance the festive vibe.
Experimenting with these suggestions not only enriches the flavor but also the overall experience. So, what will you try first? For more serving ideas, check out this dessert blog or classic cookie pairings.
Time breakdown for Red Velvet Crinkle Cookies
Preparation time
Getting started on your red velvet crinkle cookies is a breeze! You’ll need about 15 minutes to gather your ingredients and mix everything together. Make sure to have your measuring cups and mixing bowls ready for a smooth prep session.
Chilling time
Once your dough is mixed, it’s essential to chill it for at least 1 hour. This not only helps with the flavor but ensures your cookies hold their shape while baking. If you’re in a pinch, 30 minutes may work, but I highly recommend the full hour for the best results.
Baking time
When it’s time to bake, the red velvet crinkle cookies will take around 10 to 12 minutes. Keep an eye on them during the last few minutes—nothing worse than overbaked cookies!
Total time
In total, you’re looking at about 1 hour and 25 minutes from start to finish, including prep, chilling, and baking time. So, why not invite a friend over to share the fun? Check out some baking tips here for an even smoother experience!
Nutritional facts for Red Velvet Crinkle Cookies
When you’re indulging in these delicious red velvet crinkle cookies, it’s important to know what you’re actually enjoying. Here’s a quick breakdown of the nutritional facts you might want to consider before you dive in!
Calories
Each cookie packs around 150 calories, making them a delightful treat without derailing your day.
Sugar
These cookies contain approximately 12 grams of sugar each. This accounts for that classic sweetness, but it’s wise to enjoy them in moderation, especially if you’re watching your sugar intake.
Fat
Expect about 7 grams of fat per cookie, primarily from the butter and eggs used in the recipe. While they do contribute to a tasty texture, balancing these treats with healthier choices throughout the day can keep your diet on track.
For more information about the nutritional impact of cookie ingredients, check out this detailed analysis from the USDA. Enjoy your baking while being mindful of what goes into your delicious red velvet crinkle cookies!
FAQs about Red Velvet Crinkle Cookies
Can I make the dough ahead of time?
Absolutely! One of the great things about red velvet crinkle cookies is the versatility of the dough. You can prepare the dough ahead of time and store it in the refrigerator for up to three days. Just make sure to wrap it tightly in plastic wrap to maintain moisture. When you’re ready to bake, you may want to let it sit at room temperature for about 10-15 minutes to make scooping easier. This can be a lifesaver if you’re hosting a gathering and want to minimize day-of prep!
What can I substitute for red food coloring?
If you’re looking to avoid artificial colors or simply want a natural alternative, consider using beet juice or beet powder. Both options provide a lovely, vibrant hue without the need for food dye. Just keep in mind that beet juice may slightly alter the flavor of your red velvet crinkle cookies, so taste as you go to achieve the balance you love.
How do I store leftover cookies?
To keep your red velvet crinkle cookies fresh, store them in an airtight container at room temperature for up to a week. If you want to extend their shelf life, consider freezing them. Simply place them in a freezer-safe bag with layers of parchment paper in between to prevent sticking. They can last for up to three months. When you’re ready to enjoy, thaw them overnight in the fridge or pop them into the microwave for a few seconds.
With these handy FAQs, you’re well on your way to mastering the art of these delightful cookies! For more tips on baking and storage, check out expert resources like King Arthur Baking or Serious Eats.
Conclusion on Red Velvet Crinkle Cookies
In wrapping up our delightful journey into the world of red velvet crinkle cookies, it’s clear these treats are not only visually stunning but also incredibly satisfying to make (and eat!). With their rich flavor and soft, chewy texture, they’re perfect for any occasion—be it a cozy night in or a lively gathering with friends.
Remember, the key to achieving that perfect crinkle is all in the baking technique and the right balance of ingredients. So don your apron and give these cookies a try! You won’t regret it. If you’re interested in more cookie recipes, check out this amazing cookie baking guide. Happy baking!
PrintRed Velvet Crinkle Cookies: The Indulgent Treat You’ll Love
Indulge in the rich and vibrant flavor of Red Velvet Crinkle Cookies, the perfect treat for any occasion.
- Prep Time: 15 minutes
- Cook Time: 12 minutes
- Total Time: 45 minutes
- Yield: 24 cookies
- Category: Dessert
- Method: Baking
- Cuisine: American
- Diet: Vegetarian
Ingredients
- 2 cups all-purpose flour
- 1 tablespoon cocoa powder
- 2 teaspoons baking powder
- 1/2 teaspoon salt
- 1/2 cup unsalted butter, softened
- 1 cup granulated sugar
- 1 large egg
- 1 tablespoon red food coloring
- 1 teaspoon vanilla extract
- 1 tablespoon powdered sugar for dusting
Instructions
- Preheat your oven to 350°F (175°C) and line a baking sheet with parchment paper.
- In a medium bowl, whisk together the flour, cocoa powder, baking powder, and salt.
- In a large bowl, cream the softened butter and granulated sugar until light and fluffy.
- Add the egg, red food coloring, and vanilla extract to the butter mixture and mix until combined.
- Gradually add the dry ingredients to the wet ingredients, mixing until just combined.
- Chill the dough in the refrigerator for about 30 minutes.
- Once chilled, scoop out tablespoon-sized portions of dough and roll them into balls.
- Dust each ball in powdered sugar before placing them on the prepared baking sheet.
- Bake for 10-12 minutes or until the tops are set and crinkly.
- Allow to cool on the baking sheet for a few minutes before transferring to a wire rack.
Notes
- For a more intense flavor, add a teaspoon of almond extract.
- Serve with a cold glass of milk for a delightful treat.
Nutrition
- Serving Size: 1 cookie
- Calories: 150
- Sugar: 10g
- Sodium: 50mg
- Fat: 7g
- Saturated Fat: 4g
- Unsaturated Fat: 2g
- Trans Fat: 0g
- Carbohydrates: 21g
- Fiber: 1g
- Protein: 2g
- Cholesterol: 20mg