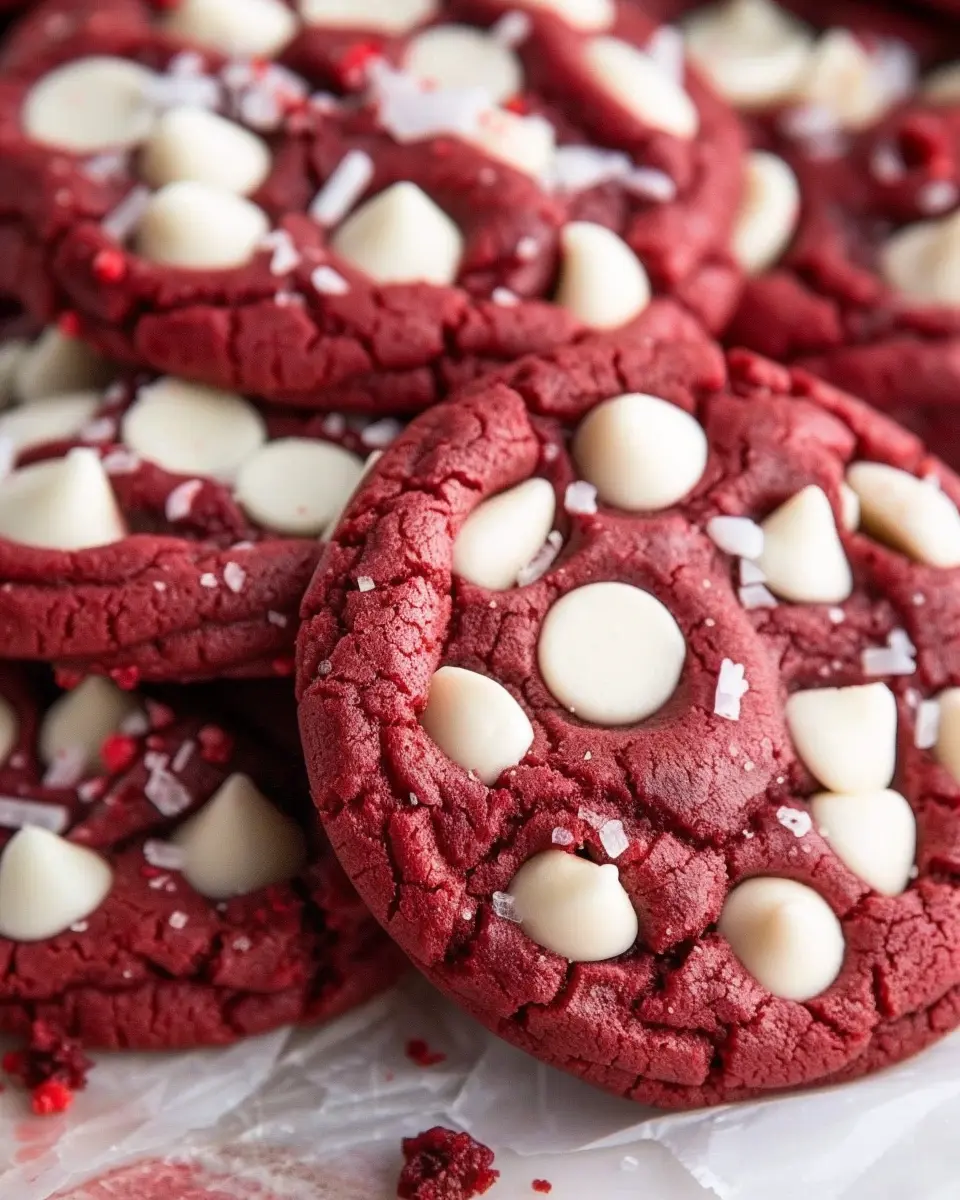
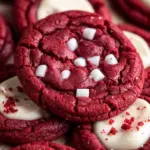
Introduction to Red Velvet Cookies
What is the origin of red velvet cookies?
Red velvet cookies share a fascinating lineage that traces back to the iconic red velvet cake, which gained popularity in the mid-20th century. Originating in the United States, particularly in the South, the red velvet flavor profile blends cocoa powder, buttermilk, and vinegar, resulting in a unique, tangy sweetness. The vibrant red hue, initially brought about by the reaction of cocoa with acidic ingredients, quickly became a visual signature.
In recent years, home bakers have embraced this delightful flavor, transforming it into creative variations like red velvet cookies. This modern twist allows us to enjoy the rich taste in a handheld treat that’s perfect for sharing (or keeping to oneself). If you’re curious to explore more about the roots of red velvet desserts, check out resources like The Spruce Eats.
Why are red velvet cookies a great choice for homemade treats?
When it comes to homemade goodies, red velvet cookies stand out for several enticing reasons:
-
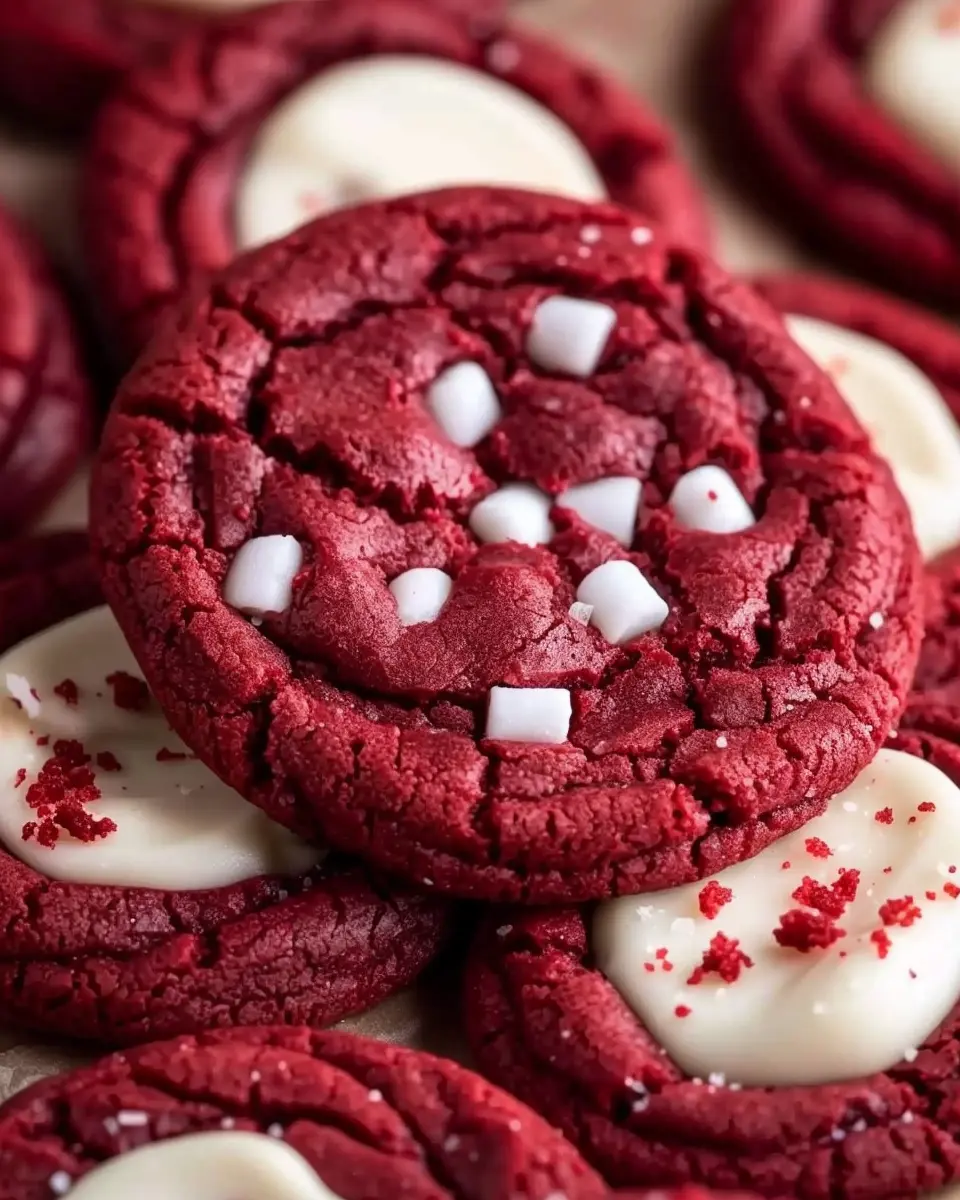
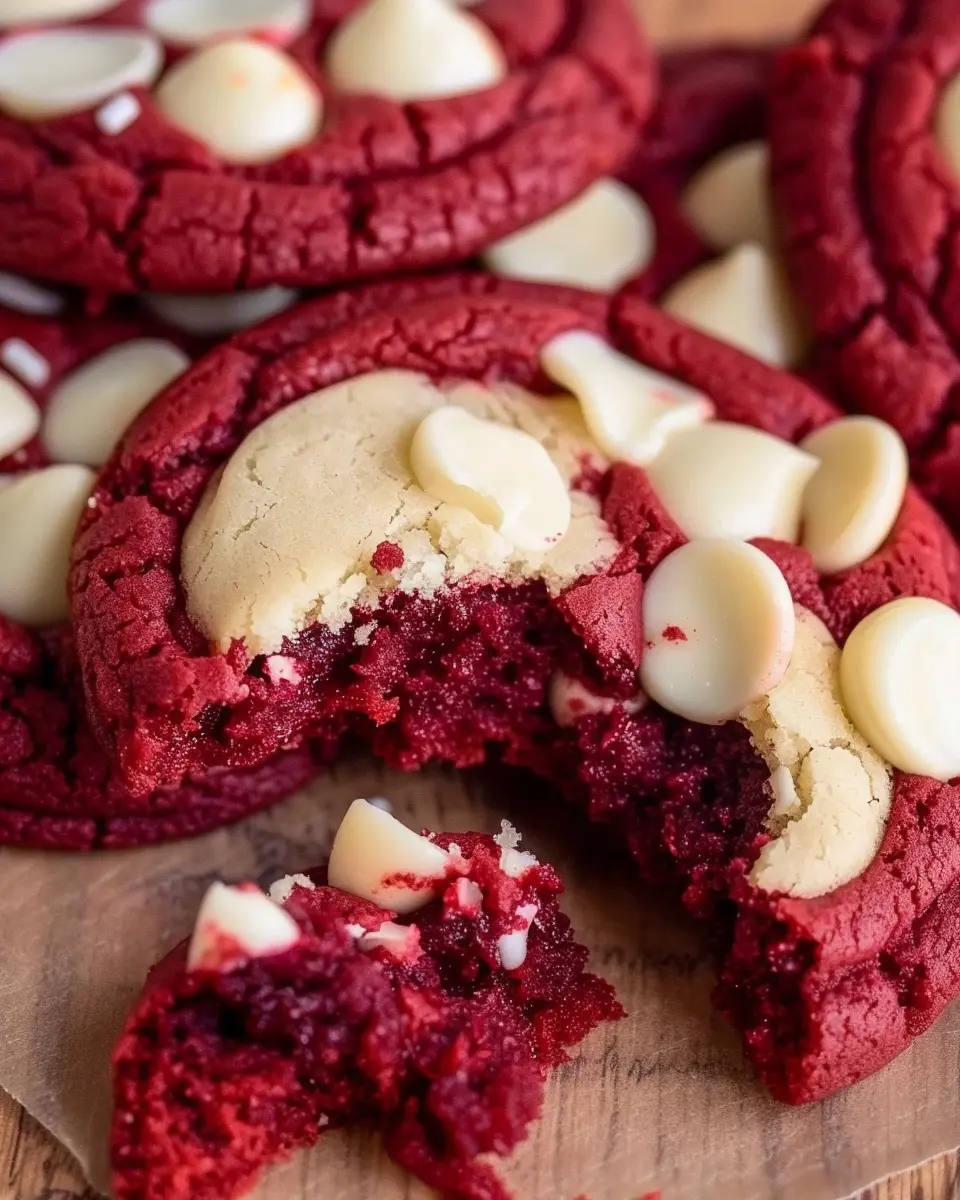
Eye-Catching Appearance: Their striking red color, often contrasted by cream cheese frosting or white chocolate chips, makes them visually appealing, perfect for special occasions.
-
Rich Flavor Profile: The flavor combines the sweetness of vanilla with a subtle hint of cocoa, offering a unique taste experience that differs from traditional chocolate cookies.
-
Versatile Texture: Whether you prefer them chewy or cakey, you can easily adjust baking times and ingredients to meet your texture preferences.
-
Easy to Customize: Want to make them more decadent? Add chocolate chunks. Prefer a hint of spice? A touch of cinnamon works wonders! The adaptability of red velvet cookies allows them to fit any baking mood.
Not only do these cookies satisfy your sweet tooth, but writing a recipe, like the one you’re about to dive into, provides a delightful activity that can be shared with friends, family, or a cozy night in. Moreover, it’s a fantastic way to make lasting memories in the kitchen. So, grab your mixing bowl and let’s bring that red velvet flair into cookie form!

Ingredients for Red Velvet Cookies
Essential ingredients for the perfect red velvet cookies
To create delectable red velvet cookies, you’ll need a few fundamental ingredients that give them their signature flavor and color. Here’s what you’ll want on your shopping list:
- All-purpose flour: This forms the base of your cookie.
- Unsweetened cocoa powder: Just a touch adds depth to the flavor.
- Granulated sugar: For sweetness that balances the chocolate.
- Brown sugar: A hint of molasses enhances moisture and richness.
- Butter: Make sure it’s softened to achieve that perfectly chewy texture.
- Eggs: They bind everything together while adding richness.
- Red food coloring: The star ingredient that gives these cookies their striking hue.
- Baking soda and baking powder: These leavening agents provide the right amount of rise.
Optional ingredients to enhance flavor and texture
While the essentials are vital, why not elevate your red velvet cookies even further? Here are some optional additions you might consider:
- White chocolate chips: These add a lovely hint of sweetness and a creamy texture.
- Chopped nuts: Pecans or walnuts can bring some crunch and flavor complexity.
- Cream cheese: Swirl in a bit of cream cheese or top cookies with cream cheese frosting for that classic red velvet cake vibe.
- Vanilla extract: A splash of pure vanilla can elevate the cookie’s flavor profile.
By tailoring your ingredients, you can make these cookies uniquely yours. Want to dive deeper into baking techniques? Check out this baking guide.
Preparing Red Velvet Cookies
Now that you’re excited to make your own batch of red velvet cookies, let’s dive into the detailed preparation steps. With a little patience and some simple ingredients, you’ll create delightful treats that will impress anyone who takes a bite!
Gather and Measure Your Ingredients
Before you start the process of making your cookies, it’s vital to gather all your ingredients and measure them accurately. This not only ensures a smooth baking experience but also helps to maintain the balance needed to achieve that perfect texture and flavor. Here’s what you’ll need:
- 2 ½ cups all-purpose flour
- 1 cup unsweetened cocoa powder
- 1 tsp baking soda
- 1 tsp salt
- 1 cup unsalted butter, softened
- 1 cup granulated sugar
- ½ cup brown sugar, packed
- 2 large eggs
- 2 tbsp red food coloring
- 2 tsp vanilla extract
- 1 cup white chocolate chips
Make sure to have all your equipment on hand as well, including mixing bowls, measuring cups, a hand mixer, and baking sheets!
Mix the Dry Ingredients
Next, it’s time to mix the dry ingredients. Grab a large mixing bowl and whisk together the all-purpose flour, cocoa powder, baking soda, and salt until they’re perfectly combined. This step is crucial because it helps evenly distribute the leavening agent (baking soda) throughout the flour, which in turn leads to uniform baking. If you’re looking to enhance the red velvet flavor, consider adding a pinch of cocoa powder. For more baking tips, check out this guide on baking basics.
Cream the Butter and Sugars
In a separate bowl, it’s time to make that luscious butter-sugar mixture. Start by creaming together your softened butter, granulated sugar, and brown sugar using a hand mixer on medium speed until the mixture is light and fluffy. This process typically takes about 3-4 minutes and will give your cookies a lovely texture. You’ll know it’s ready when the mix becomes pale and airy!
Incorporate the Wet Ingredients
Now that we have a fluffy base, let’s mix in the wet ingredients. Add the eggs, one at a time, allowing each to incorporate fully before adding the next. Then, mix in the red food coloring and vanilla extract. Don’t be afraid to channel your inner artist — this is where you’ll create that stunning red hue that makes red velvet cookies so iconic!
Combine the Dry and Wet Ingredients
Gradually add the dry ingredient mixture into the wet ingredients. Use a spatula for a more gentle folding motion to avoid overmixing—this is key to keeping your cookies soft! Combine until just mixed; a little lumpiness is perfectly fine as it gives your cookies character.
Add the White Chocolate and Form the Dough
Now comes the really fun part: adding in those delicious white chocolate chips! Gently fold them into the dough, making sure they’re evenly distributed. Once complete, scoop out portions using a cookie scoop or tablespoon and place them on your prepared baking sheets. Each cookie should have enough spacing for expansion during baking.
Bake the Cookies to Perfection
Preheat your oven to 350°F (175°C) and pop those babies in! Bake for 10-12 minutes, keeping an eye on them towards the end to avoid overbaking. They’re done when the edges are set but the centers still look a bit soft. The cookies will firm up as they cool, giving you that perfect balance of chewy and decadent.
Now that you’re prepared to create these scrumptious red velvet cookies, embrace the joy of baking and enjoy the delicious results of your hard work! Share your experiences and favorite variations, and don’t hesitate to experiment with different types of chocolate or add-ins. Happy baking!
Variations on Red Velvet Cookies
Exploring variations on red velvet cookies can be a delightful adventure, especially if you’re looking to impress family and friends with unique treats. Let’s dig into some fun and scrumptious options!
Gluten-Free Red Velvet Cookies
For those with gluten sensitivities, fear not! You can easily create gluten-free red velvet cookies. Simply substitute the all-purpose flour with a good quality gluten-free blend or almond flour. This simple switch allows you to enjoy the same rich flavor and color without any gluten. Don’t forget to check out this guide on gluten-free baking for tips on achieving the right texture.
Red Velvet Cookies with Nuts
Want to add a little crunch to your red velvet cookies? Consider mixing in some finely chopped nuts, like walnuts or pecans! Nuts not only give your cookies a lovely texture but also a nutty flavor that beautifully complements the chocolate undertones of red velvet. Plus, they add an extra layer of nutrition. For a unique twist, try using pistachios for a pop of color and flavor!
Red Velvet Whoopie Pies
If you’re feeling adventurous, why not transform your red velvet cookies into whoopie pies? Bake two cookie rounds and fill them with a luscious cream cheese frosting. Not only are they incredibly easy to make, but they also make for a fun dessert that’s perfect for parties or a casual get-together. Your friends will love the soft, cake-like texture combined with the creamy center.
So, what are you waiting for? Get creative in the kitchen and make one of these delightful variations!
Baking Tips and Notes for Red Velvet Cookies
Measuring Flour Accurately
One of the key factors in baking red velvet cookies is measuring flour properly. Use the spoon-and-level method: spoon the flour into your measuring cup and level it off with a knife. This technique ensures you don’t pack in too much flour, which can lead to dry cookies. According to baking experts, the right flour measurement can be the difference between a soft, chewy cookie and a dense mishap. Invest in a kitchen scale for the most accurate measurement—one cup of all-purpose flour generally weighs around 120 grams, depending on how it’s packed.
Achieving the Right Cookie Texture
The texture of your red velvet cookies can make or break the experience. Aim for a balance between soft and chewy. Start by creaming your butter and sugars thoroughly; this aerates the mixture, creating a light crumb. Don’t forget to chill your dough for at least 30 minutes before baking. Chilling helps solidify the fats, leading to a thicker cookie that spreads less during baking—perfect for those beautifully pillowy results you dream about. As a personal tip, I always bake a test cookie to see if any adjustments are necessary. Happy baking!
For more flour measuring tips, check out this comprehensive guide from King Arthur Baking. For cookies from around the world, visit the Food Network.
Serving suggestions for Red Velvet Cookies
Pairing with beverages
When it comes to enjoying red velvet cookies, the right beverage can transform your experience from delightful to extraordinary. Try pairing these cookies with:
- Milk (dairy or plant-based): The classic choice! The creaminess complements the rich cocoa flavor beautifully.
- Cold brew coffee: For a sophisticated twist, blend the sweetness of the cookies with a refreshing cold brew. It’s a great way to kick-start your afternoon.
- Herbal teas: Consider pairing with a soothing chamomile or a zesty ginger tea. The contrasting flavors create a delightful balance.
For more beverage pairing ideas, check out Epicurious.
Creative serving ideas for gatherings
Elevate your gatherings with red velvet cookies that not only taste great but also look incredible:
- Cookie platter: Arrange your cookies on a colorful platter along with other treats. Offering a variety encourages sharing and conversation.
- Mini dessert sandwiches: Spread a thin layer of cream cheese frosting between two cookies. It’s an unexpected delight that will impress your guests.
- Cookie decorating station: Set up toppings like sprinkles, nuts, or drizzled chocolate. Let your friends personalize their cookies—it’s interactive and fun!
With these serving suggestions, your red velvet cookies will be the highlight of any event!
Tips for Making Perfect Red Velvet Cookies
Avoiding Common Baking Mistakes
When it comes to baking red velvet cookies, precision is key. Here are some handy tips to keep in mind:
- Measure Ingredients Accurately: Use a scale for dry ingredients to ensure you’re getting the right amount. Too much flour can make your cookies tough.
- Room Temperature Ingredients: Make sure your butter and eggs are at room temperature. This helps create a fluffy texture.
- Don’t Overmix: After adding your dry ingredients, mix just until combined. Overmixing can lead to dense cookies instead of the soft, chewy texture we love.
For more insights on common baking mistakes, you might find this baking tips guide helpful.
How to Store and Keep Cookies Fresh
Keeping your red velvet cookies fresh is essential for maintaining their delightfully soft texture. Here’s how:
- Sealed Containers: Store your cookies in an airtight container at room temperature. This helps retain moisture and keeps them soft.
- Freezing for Later: If you want to make a batch ahead of time, freeze them! Just ensure they are well-wrapped to prevent freezer burn. They can stay fresh for up to three months in the freezer.
- Revive Stale Cookies: If your cookies do happen to go a bit stale, placing a slice of bread in the container can help restore moisture and flavor.
With these tips, you’re well on your way to baking the ultimate red velvet cookies! Don’t forget to share your baking stories or any twists you add to the recipe!
Time details for Red Velvet Cookies
Preparation time
Getting your red velvet cookies ready is a breeze, taking only about 15 minutes. Just gather your ingredients, such as flour, cocoa powder, and food coloring. Make sure to line your baking tray while you’re at it!
Baking time
The sweet aroma of your cookies will fill your kitchen in just 10 to 12 minutes of baking time. Keep a close eye on them; you want them soft yet set for that perfect texture.
Total time
In just about 30 minutes, you’ll be enjoying some delicious red velvet cookies. For tips on ingredient substitutions, check out this helpful guide to elevate your cookie-making game! Baking doesn’t have to be a chore—enjoy every moment of the process!
Nutritional Information for Red Velvet Cookies
When you’re indulging in red velvet cookies, it’s good to know what you’re treating yourself to. Each cookie generally contains around 150 calories, making it a delightful yet moderate indulgence.
Understanding Sugar Content
These cookies are typically sweet, featuring about 10 grams of sugar per cookie. Sweetness aside, they won’t derail your day if enjoyed in moderation.
Tips for Moderating Indulgence
- Pair with a drink: Try a glass of almond milk or a flavorful herbal tea to balance the sweetness.
- Limit portions: Consider enjoying just one cookie with a friend—sharing is caring!
- Savor slowly: Take your time to enjoy each bite, which can help you feel satisfied with less.
For more insights on nutrition, check out the USDA FoodData Central for deeper dives into cookie ingredients. Remember, with a little mindfulness, you can enjoy your delicious treats while staying balanced.
FAQs about Red Velvet Cookies
Can I use different types of chocolate?
Absolutely! While traditional red velvet cookies often call for semi-sweet chocolate or white chocolate chips to pair with the rich cocoa flavor, you can experiment with different types. Dark chocolate enhances the deep flavors, while milk chocolate adds a sweet, creamy contrast. If you’re feeling adventurous, try tossing in some chopped chocolate bars or even butterscotch chips for a unique twist! Just ensure any chocolate you use complements the cookie’s flavor.
What’s the best way to store leftover cookies?
To keep your red velvet cookies fresh and delicious, store them in an airtight container at room temperature. They usually stay soft and chewy for about 3-5 days. If you want to prolong their deliciousness, consider freezing them! Just wrap each cookie individually in plastic wrap or aluminum foil, then place them in a zip-top freezer bag. They can last up to three months in the freezer. When you’re ready to indulge, let them thaw at room temperature!
How can I achieve a deeper red color in my cookies?
If you’re aiming for that visually striking deep red hue in your red velvet cookies, consider using a higher quality red food coloring. Gel food dyes offer more vibrancy than liquid versions and don’t alter the texture of your cookies. Additionally, be sure to adjust the cocoa powder you use. Some bakers find that using a bit less cocoa can help the red color stand out more. Remember, the goal is to balance flavors while achieving that beautiful color!
For further tips, check out Baker’s Journal for expert baking insights!
Conclusion on Red Velvet Cookies
The Joy of Homemade Baking
There’s something wonderfully satisfying about baking from scratch, especially when it comes to red velvet cookies. The rich flavor and vibrant color bring delight to any gathering, making them perfect for celebrations or just a cozy night in.
When you take the time to create these treats in your kitchen, you’re not just mixing ingredients; you’re crafting memories and sharing joy with loved ones. As you savor each bite, you’ll appreciate the love and effort poured into every cookie.
For more baking inspiration, explore The Kitchn for creative ideas and techniques that will elevate your homemade goodies. Happy baking!
PrintRed Velvet Cookies: Indulgent Treats for Home Bakers
Delve into the delightful world of red velvet cookies, where rich flavors and a vibrant hue make for the perfect baked treat.
- Prep Time: 20 minutes
- Cook Time: 12 minutes
- Total Time: 32 minutes
- Yield: 24 cookies
- Category: Dessert
- Method: Baking
- Cuisine: American
- Diet: Vegetarian
Ingredients
- 1 cup unsalted butter
- 1 cup granulated sugar
- 1 large egg
- 2 tablespoons red food coloring
- 1 teaspoon vanilla extract
- 2 cups all-purpose flour
- 1 teaspoon baking soda
- 1/2 teaspoon salt
- 1/2 teaspoon cocoa powder
- 1 cup white chocolate chips
Instructions
- Preheat oven to 350°F (175°C).
- In a large bowl, cream together the butter and sugar until light and fluffy.
- Beat in the egg, red food coloring, and vanilla extract.
- In a separate bowl, whisk together the flour, baking soda, salt, and cocoa powder.
- Gradually add the dry ingredients to the wet ingredients, mixing until just combined.
- Fold in the white chocolate chips.
- Drop tablespoonfuls of dough onto a baking sheet lined with parchment paper.
- Bake for 10-12 minutes or until edges are set.
- Allow to cool on the baking sheet for a few minutes before transferring to a wire rack.
Notes
- For a more intense flavor, add a splash of almond extract.
- Chill the dough for 30 minutes before baking for thicker cookies.
Nutrition
- Serving Size: 1 cookie
- Calories: 150
- Sugar: 10g
- Sodium: 100mg
- Fat: 7g
- Saturated Fat: 4g
- Unsaturated Fat: 2g
- Trans Fat: 0g
- Carbohydrates: 20g
- Fiber: 0g
- Protein: 2g
- Cholesterol: 30mg