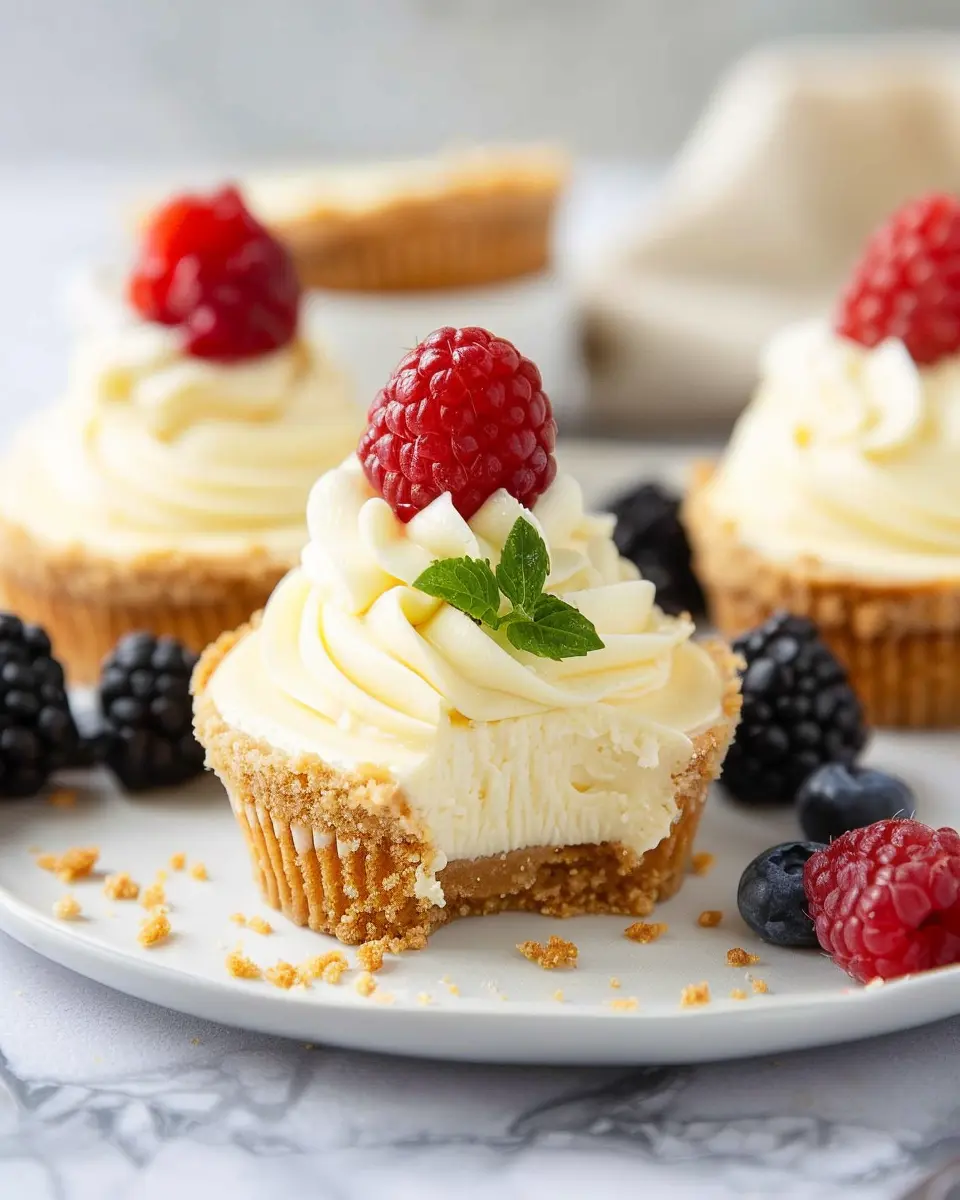
Introduction to Mini Cheesecake Cups
If you’re a young professional juggling a busy work schedule, you’re likely always on the lookout for quick and delightful desserts that can easily fit into your life. Enter mini cheesecake cups—the perfect solution for satisfying your sweet tooth without the hassle of a traditional cheesecake.
Why Mini Cheesecake Cups Are a Dream Come True
Mini cheesecake cups are not just about their adorable size; they bring a host of benefits to the table. Let’s explore why they might just become your go-to treat:
-
Simple to Prepare: Forget spending hours in the kitchen. These delectable desserts can be whipped up in about 30 minutes. Ideal for a quick post-dinner fix or a last-minute treat for friends.
-
Portion Control: We all love indulgence, but enjoying a huge slice of cheesecake can often lead to a guilty conscience. With mini cheesecake cups, you can relish every bite without overdoing it. Plus, you can easily customize portions based on your sweet cravings that day.
-
Versatile Flavors: The flavor possibilities are endless! From classic vanilla to exciting chocolate or berry blends, you can adapt your mini cheesecake cups to fit any occasion. Check out resources like Serious Eats for flavor inspiration.
-
Perfect for Sharing: These little cups can be great ice breakers at gatherings—who doesn’t love a beautifully presented dessert? Whether it’s a brunch with friends or a casual office celebration, mini cheesecake cups make sharing easy and fun.
-
Make-Ahead Convenience: For busy young professionals, making desserts ahead of time is essential. You can prepare these cups in batches, store them in the fridge, and simply grab one whenever you desire a sweet treat.
Imagine winding down after a hectic day, curling up on the couch with your favorite show, and savoring a mini cheesecake cup. The joy of indulging in a delightful dessert without the fuss could be precisely what you need to recharge.
The next time you’re planning a gathering or just want to spoil yourself, these mini cheesecake cups will be a flavorful addition that combines convenience and taste. Ready to dive in? Let’s get to the recipe!

Ingredients for Mini Cheesecake Cups
Creating delicious mini cheesecake cups at home is not only fun but fulfilling. Let’s break down the essential ingredients you’ll need to whip these up effortlessly.
Essential ingredients for the crust
For a perfectly balanced crust that complements the creamy filling, you’ll need:
- Graham crackers: About 1 ½ cups, crushed for that classic flavor.
- Butter: 1/4 cup of unsalted butter, melted to bind the crumbs together.
- Sugar: A couple of tablespoons for sweetness.
This simple crust sets the stage for your indulgent cheesecakes while providing a satisfying crunch.
Components of the cheesecake filling
The heart of any mini cheesecake cups is the filling, and here’s what you should gather:
- Cream cheese: Two 8-ounce packages, softened to give that velvety texture.
- Granulated sugar: 1/2 cup to balance the tanginess.
- Sour cream: 1/4 cup enhances the creaminess and adds a slight tang.
- Vanilla extract: 1 teaspoon will elevate the flavor profile.
- Eggs: Two large eggs, essential for the richness.
Putting these together will give you a luscious cheesecake filling that’s hard to resist.
Tasty toppings to elevate your mini cheesecakes
Now let’s talk toppings, the magic touch for your mini cheesecake cups. Consider:
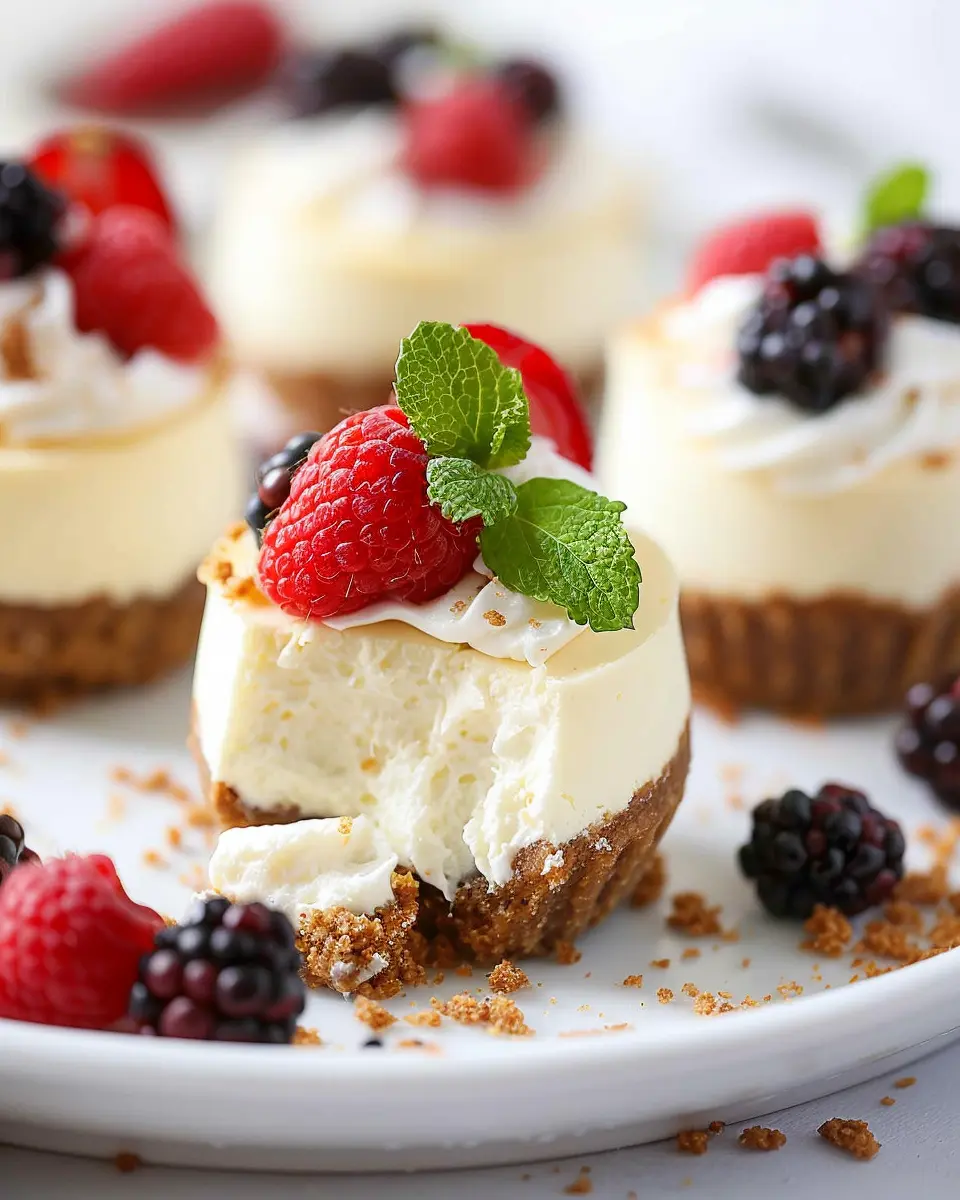
- Fresh fruit: Strawberries or blueberries for a pop of color and freshness.
- Chocolate ganache: Drizzle this over the top for ultimate indulgence.
- Caramel sauce: A sweet, gooey finish that never disappoints.
These toppings not only enhance the flavor but also make your mini cheesecakes visually stunning. Ready to get baking? Your friends will love these delightful bites!
Step-by-Step Preparation for Mini Cheesecake Cups
Preparing delicious mini cheesecake cups is a fantastic way to indulge in a rich, creamy dessert without the commitment of a whole cheesecake. Perfect for gatherings or as a sweet treat for yourself, these little delights are sure to impress. Let’s walk through each step so you can create them with ease and confidence.
Preheat your oven and prepare the muffin pan
Before you get your hands into the ingredients, it’s essential to take a few moments to prepare your workspace. Preheat your oven to 325°F (160°C)—the perfect temperature for baking these mini cheesecake cups without overcooking.
While your oven is warming up, grab your muffin pan. Generously grease it with cooking spray or line it with cupcake liners. Using liners not only makes for easy cleanup; they also ensure your cheesecakes come out intact. If you want a bit of extra assurance, you can butter the liners lightly for a better release after baking.
Make the graham cracker crust
The crust is the foundation of your mini cheesecake cups, offering a delightful crunch that perfectly complements the creamy filling. Here’s how to do it:
- 1 ½ cups graham cracker crumbs
- ⅓ cup granulated sugar
- ½ cup melted unsalted butter
In a mixing bowl, combine the graham cracker crumbs and sugar. Pour in the melted butter, mixing well until all crumbs are evenly coated and look like wet sand. Divide this mixture into your muffin pan, pressing down firmly with the back of a spoon or your fingers to ensure a solid base. Pre-bake the crust for about 5-7 minutes. This step helps the crust hold its shape while baking the cheesecake filling.
Create the cheesecake filling
Now onto the star of the show—the cheesecake filling! You’ll need these standout ingredients:
- 16 ounces cream cheese, softened
- ½ cup granulated sugar
- 1 teaspoon vanilla extract
- 2 large eggs
- ½ cup sour cream (or Greek yogurt for a lighter option)
Using a mixer, beat the cream cheese until smooth. Gradually add the sugar, mixing until well combined. Then, stir in the vanilla and sour cream, followed by the eggs, one at a time. Ensure you scrape down the sides of the bowl so that everything mixes thoroughly. The batter should be creamy and lump-free.
For a fun twist, consider adding a bit of lemon zest or chocolate chips to the filling. Why not experiment a little? This is your dessert after all!
Bake your mini cheesecakes to perfection
Carefully pour the cheesecake filling over each graham cracker crust in the muffin pan. Don’t fill them to the top; leave a little space as they will rise slightly while baking.
Place the muffin pan in your preheated oven and bake for about 20-25 minutes, or until the centers are set but still slightly jiggly. Cool your mini cheesecake cups in the pan for about 10 minutes before transferring them to a wire rack to cool completely.
Cool and chill before serving
After baking, it’s essential to let your mini cheesecake cups cool. Once they reach room temperature, pop them into the refrigerator for at least 2 hours—they’ll set even more and taste much better chilled.
When you’re ready to serve, consider topping them with fresh fruit, whipped cream, or even a drizzle of chocolate sauce to add a special touch.
Enjoying these mini cheesecakes is a wonderful way to satisfy your sweet tooth without the fuss! Plus, they’re customizable—so feel free to get creative. For a deeper dive into cheesecake variations, check out BBC Good Food’s cheesecake collection for inspiration while you wait for your treats to chill.
With these simple steps, you’re well on your way to creating delightful mini cheesecake cups that are bound to be a hit! Happy baking!
Variations on Mini Cheesecake Cups
Exploring the delightful world of mini cheesecake cups opens up endless possibilities to suit different tastes and occasions. Whether you’re hosting a brunch or craving a sweet treat, these variations will inspire your creativity.
Fruit-topped Mini Cheesecakes
Fresh fruit is a classic topping that elevates your mini cheesecake cups. Consider using seasonal favorites like strawberries, blueberries, or even tropical mango slices. Simply slice or puree the fruit and let it shine atop your cheesecake. For an added twist, drizzle a bit of honey or maple syrup to enhance the sweetness. If you’re feeling adventurous, try a mix of berries for a colorful presentation! For more fruit topping ideas, check out this fruit dessert guide.
Decadent Chocolate Ganache Mini Cheesecakes
For chocolate lovers, nothing beats a chocolate ganache topping. It’s simple to make: just melt chocolate with heavy cream, stir until smooth, and pour over your cooled mini cheesecake cups. The luscious texture and rich flavor create a perfect balance, especially if you sprinkle on some sea salt for contrast. Plus, a sprinkle of crushed nuts or chocolate shavings on top can add an irresistible crunch.
No-Bake Mini Cheesecake Options
Busy schedules don’t have to compromise your dessert dreams. No-bake mini cheesecake cups are a breeze! Just whip together cream cheese, sugar, and whipped cream, then spoon into your cups and chill until set. This method results in a creamy, light cheesecake that’s perfect for warm days or impromptu gatherings. Customize these by infusing flavors like vanilla, lemon zest, or even matcha powder for a fun twist. Check out more on no-bake desserts at this cooking site.
With these variations, your mini cheesecake cups will be the star of any event. So, which one will you try first?
Cooking Tips and Notes for Mini Cheesecake Cups
Tips for Achieving the Perfect Cheesecake Texture
To whip up mini cheesecake cups that are creamy and smooth, pay close attention to your ingredients. Always use room temperature cream cheese, as this ensures an even mixture without lumps. Mixing at lower speeds can help prevent airy batter—no one wants a puffy cheesecake! For an extra silky texture, consider incorporating sour cream or Greek yogurt into your filling.
Common Pitfalls to Avoid When Making Mini Cheesecakes
Some common missteps can derail your cheesecake dreams. First, be careful not to overbake your mini cheesecakes; they should be slightly jiggly in the center when you take them out of the oven, as they will continue firming up while cooling. Also, don’t skip the water bath, as it helps create a gentle heat and prevents the tops from cracking. Lastly, give them ample time to chill in the fridge before serving; this allows all those delicious flavors to meld together beautifully.
For more baking tips, check out resources like The Kitchn or Serious Eats. Happy baking!

Serving Suggestions for Mini Cheesecake Cups
Creative Ways to Present Your Mini Cheesecakes
When it comes to serving mini cheesecake cups, presentation is key. Consider using clear glass dessert cups or elegant ramekins to showcase those delicious layers. Topping your cheesecakes with seasonal fruits, like vibrant berries or sliced kiwi, adds a pop of color and freshness. If you’re feeling artistic, drizzling caramel, chocolate, or berry sauces can elevate the visual appeal. A sprinkle of crushed nuts or a dusting of powdered sugar can add texture and an extra touch of elegance. Want to impress guests? Try arranging multiple mini cheesecake cups on a stylish platter.
Pairing with Refreshing Beverages
These mini cheesecake cups pair excellently with beverages that complement their rich flavor. A refreshing iced tea, lemon-infused sparkling water, or creamy coffee are fantastic choices. You could even serve them alongside a homemade fruit smoothie for a fun twist. The contrast between the sweet, creamy cheesecake and the bubbly or zesty drink makes for a delightful experience. For more pairing ideas, check out this article on food and drink pairings.
With these serving suggestions, your mini cheesecakes will surely be the highlight of any gathering!
Time Breakdown for Mini Cheesecake Cups
Preparation time
Getting your ingredients ready for these delicious mini cheesecake cups takes about 15 minutes. Gather your cream cheese, sugar, and other essentials without any rush—it’s all about enjoying the process!
Baking time
Once you’ve prepped your mixture, baking those little delights will only take around 25 minutes. You’ll want to keep an eye on them while they bake, as you want that golden brown top without being overly done.
Total time
In just about 40 minutes total, you’ll have delightful mini cheesecake cups ready for your taste buds. Whether they’re for a gathering or a sweet treat after dinner, it’s a quick and simple dessert to whip up.
For tips on the best cheesecake brands, check out resources from Food Network or Serious Eats!
Nutritional Facts for Mini Cheesecake Cups
When indulging in mini cheesecake cups, it’s good to know what you’re treating yourself to. Here’s a quick breakdown of the nutritional facts per serving:
Calories per serving
These delightful treats are typically around 200-250 calories each, making them a moderate dessert option for those watching their intake but still wanting to enjoy something sweet.
Protein content
Each serving contains about 4-6 grams of protein, thanks to the cream cheese and other ingredients. While it’s not a hefty protein source, it’s a tasty way to make dessert a bit more satisfying.
Sugar and fat breakdown
Mini cheesecake cups usually have around 12-15 grams of sugar and 10-12 grams of fat. Opting for low-fat cream cheese can help reduce both sugar and fat content while maintaining that creamy texture. For tips on healthier substitutions, check out resources like Healthline or the USDA food database.
Enjoy these little delights without guilt—they’re a perfectly portioned sweet treat!
FAQs about Mini Cheesecake Cups
How do I store leftover mini cheesecakes?
If you’re lucky enough to have leftovers from your delicious mini cheesecake cups, you’ll want to store them properly to keep them fresh. The best way to do this is to place them in an airtight container in the refrigerator. They typically stay good for about 3 to 5 days. If you want to keep them longer, consider freezing them! Just wrap each cup in plastic wrap and place them in a freezer-safe container. They’ll last for about a month. When you’re ready to enjoy them again, let them thaw in the fridge overnight for the best texture.
Can I customize the sweetener in the cheesecake filling?
Absolutely! The beauty of mini cheesecake cups is their versatility. If you’re looking to cut down on sugar or cater to dietary preferences, you can substitute traditional sugar with alternatives like honey, maple syrup, or even a sugar substitute like stevia or erythritol. Keep in mind that using liquid sweeteners may alter the texture slightly, so you might want to adjust the cream cheese ratio to maintain that perfect creaminess.
What’s the best way to avoid cracks in the cheesecake?
Cracks can happen to the best of us, but there are a few tricks to help prevent them:
- Room Temperature Ingredients: Ensure your cream cheese is at room temperature before mixing. Cold ingredients can lead to a lumpy batter that doesn’t bake evenly.
- Avoid Overmixing: Mix just until everything is combined. Overmixing can introduce too much air, which expands in the oven and causes cracks.
- Water Bath Method: If you’re feeling ambitious, baking your mini cheesecake cups in a water bath can help regulate the temperature and create a moist environment, reducing the chances of cracks.
By following these tips, you’ll enhance both the appearance and texture of your mini cheesecake cups! For more baking tips, you might find this guide on baking techniques helpful.
Conclusion on Mini Cheesecake Cups
Why You Should Try Making These Easy Mini Cheesecakes at Home
If you’re looking for a delightful dessert that impresses without the complexity, mini cheesecake cups are the perfect answer. These little treats can be customized to suit any palate, from rich chocolate to fruity flavors. Plus, making them at home allows you to control the ingredients, ensuring a fresher taste and healthier options.
Why not ditch the store-bought versions and indulge in your creative side? Prepare these mini cheesecake cups for gatherings, or simply enjoy as a personal indulgence. Once you taste that creamy goodness, you’ll be glad you gave it a shot! For more inspiration, check out this guide on dessert customization that can spark your culinary creativity.
PrintMini Cheesecake Cups: Indulgent Treats for Every Occasion

Delight in these mini cheesecake cups that offer a rich and creamy dessert experience for any celebration.
- Prep Time: 20 minutes
- Cook Time: 20 minutes
- Total Time: 4 hours 40 minutes
- Yield: 12 servings
- Category: Dessert
- Method: Baking
- Cuisine: American
- Diet: Vegetarian
Ingredients
- 1 cup graham cracker crumbs
- 1/4 cup sugar
- 1/2 cup unsalted butter, melted
- 16 ounces cream cheese, softened
- 1 cup powdered sugar
- 1 teaspoon vanilla extract
- 1 cup heavy whipping cream
- 2 tablespoons lemon juice
Instructions
- Preheat the oven to 325°F (163°C).
- In a bowl, mix the graham cracker crumbs, sugar, and melted butter until combined.
- Press the mixture into the bottom of muffin tins to create the crust.
- In a separate bowl, beat together the cream cheese, powdered sugar, and vanilla until smooth.
- Add the heavy cream and lemon juice, mixing until fluffy.
- Pour the cream cheese mixture over the crust in each cup.
- Bake for 20 minutes, then let cool before refrigerating for at least 4 hours.
- Serve chilled and enjoy your mini cheesecake cups!
Notes
- These can be topped with fresh fruits or chocolate sauce for extra flavor.
- Make sure to let them cool completely before refrigeration for best results.
Nutrition
- Serving Size: 1 cup
- Calories: 250
- Sugar: 15g
- Sodium: 150mg
- Fat: 18g
- Saturated Fat: 10g
- Unsaturated Fat: 5g
- Trans Fat: 0g
- Carbohydrates: 22g
- Fiber: 1g
- Protein: 3g
- Cholesterol: 50mg