Introduction to Burnt Basque Cheesecake
What is Burnt Basque Cheesecake?
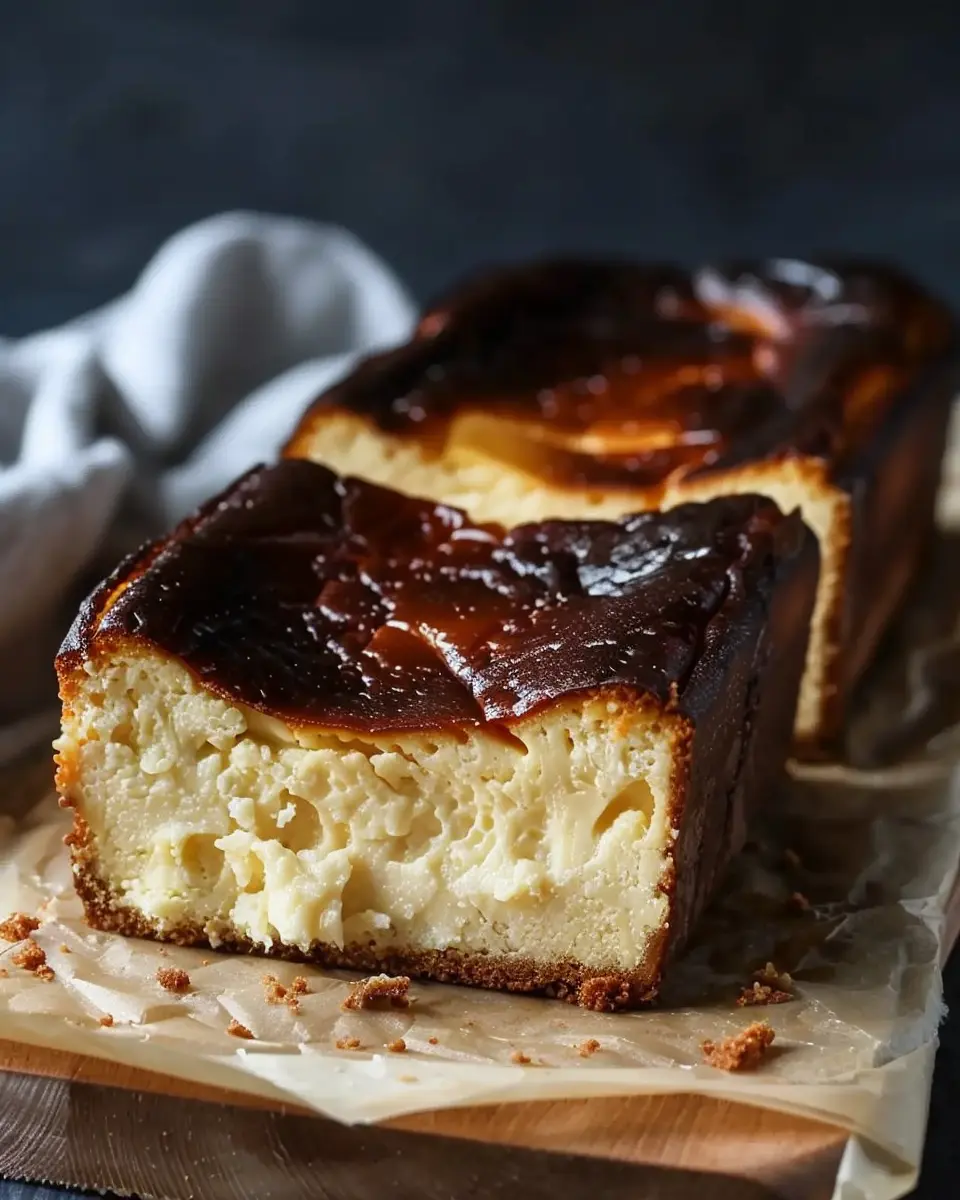
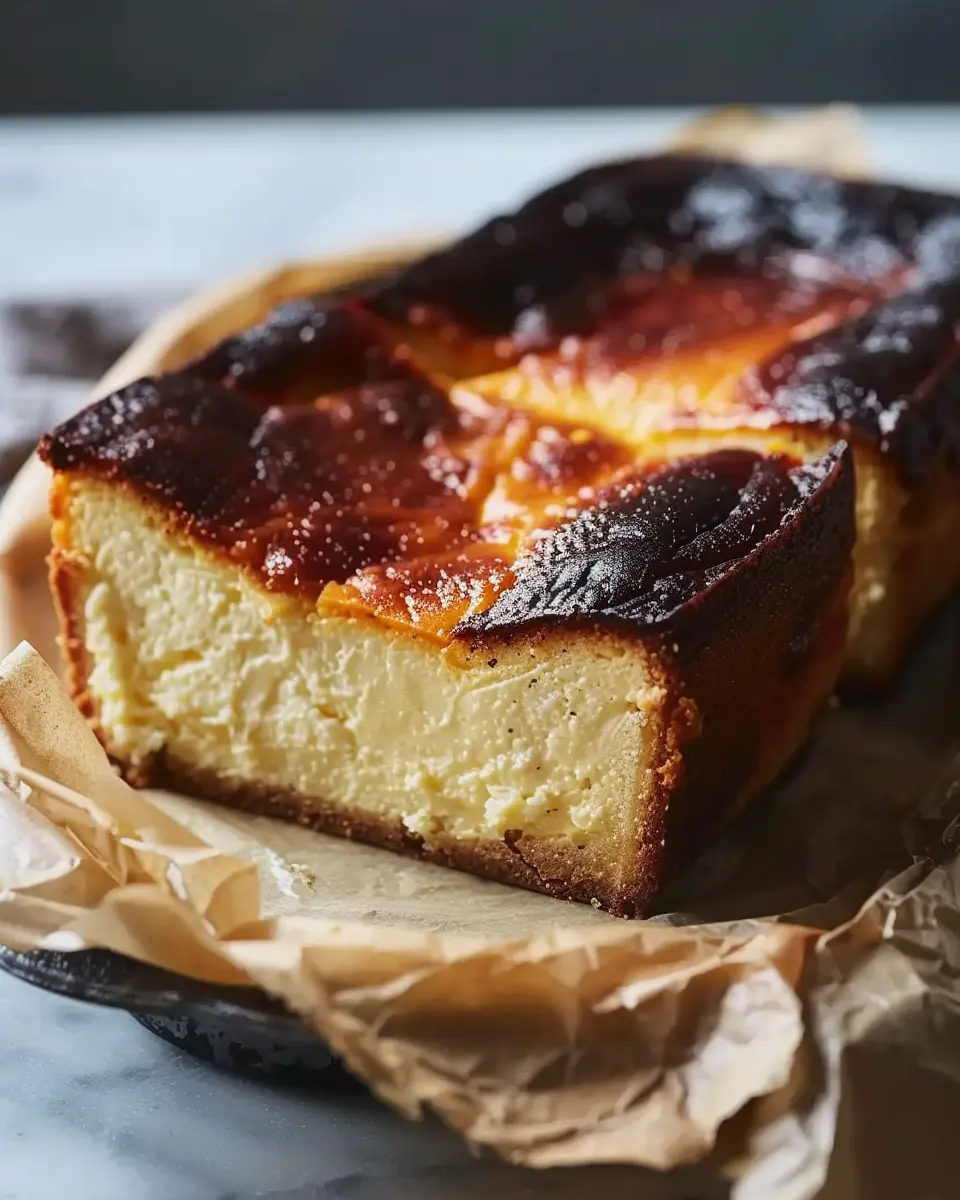
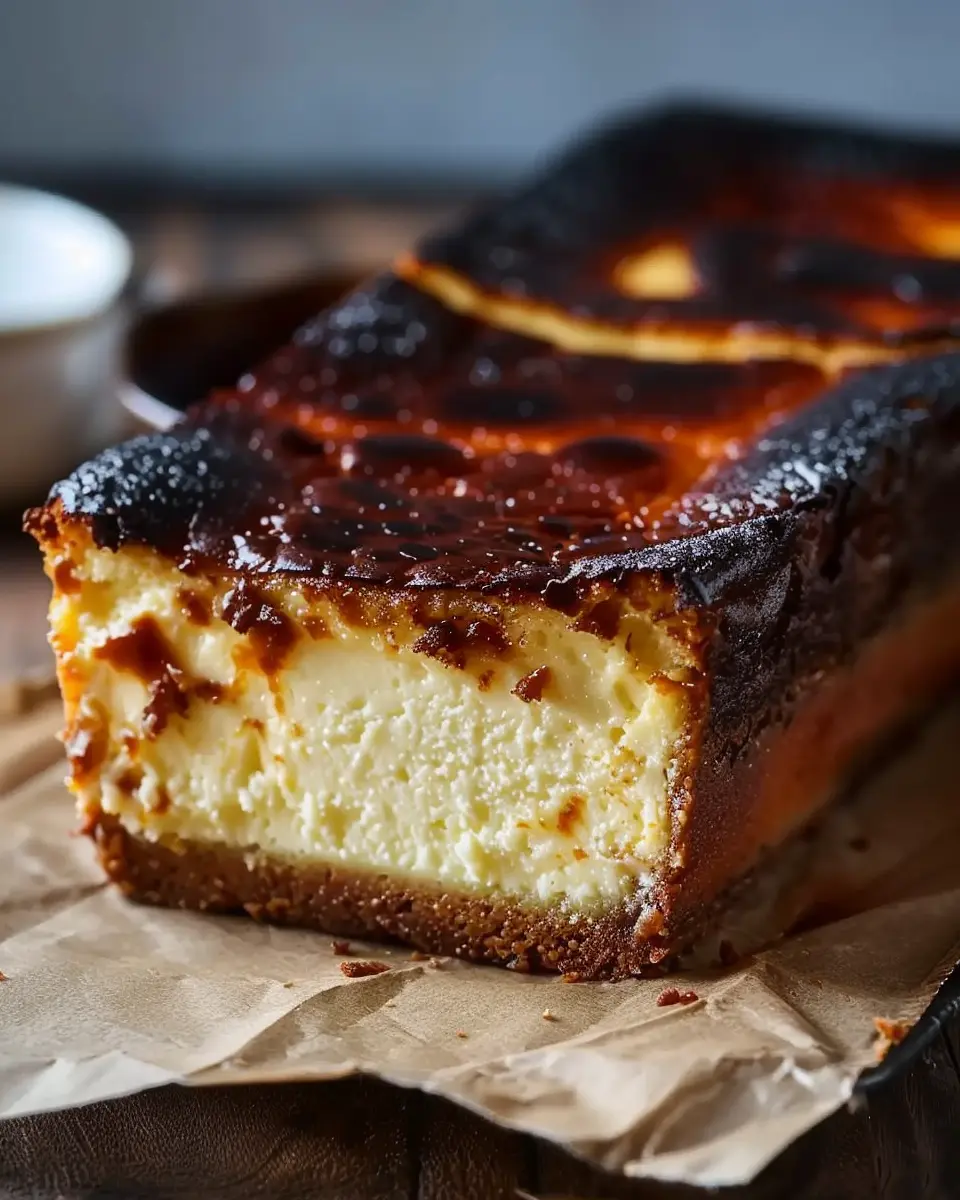
If you’ve ever craved a dessert that perfectly balances creamy richness with a hint of caramelized flavor, you’re in for a treat—burnt Basque cheesecake is what dreams are made of! Originating from the Basque region in Spain, this unique cheesecake is known for its intentionally scorched top and delightfully light texture. Unlike traditional cheesecakes that often sit on a graham cracker crust, this beauty is baked in a simple cake pan without a crust, allowing the smooth cream cheese filling to take center stage. The result? A dessert that’s both creamy and slightly charred, offering an unexpected yet comforting flavor.
With just a handful of ingredients like cream cheese, sugar, eggs, and heavy cream, it’s surprisingly easy to achieve that rich, melt-in-your-mouth goodness. Many people might wonder why it’s called “burnt” cheesecake. The answer lies in the recipe’s unique baking method, which intentionally creates a dark, caramelized exterior that contrasts beautifully with the creamy interior. To learn more about this dessert’s authentic origins, you can check out renowned food blogs like Serious Eats or Bon Appétit.
The Rise in Popularity of Basque Cheesecake
In recent years, burnt Basque cheesecake has transcended its humble beginnings. Social media platforms, especially Instagram and TikTok, have played a massive role in its meteoric rise. After many viral videos showcasing its luscious texture and stunning appearance, chefs and home bakers alike began to whip up their versions of the cake to share online.
But it’s not just about looks—this cheesecake strikes the perfect balance between sweet and slightly savory, making it an attractive option for dessert lovers. Many bakers enjoy skipping the crust, as it allows for a purer cheesecake experience. In 2020 alone, searches for Basque cheesecake increased by over 300%, showing just how much people are eager to try their hand at this delicious dessert.
So whether you’re a seasoned baker or new in the kitchen, making a burnt Basque cheesecake is both a delicious challenge and a delightful reward. In our recipe for burnt Basque cheesecake in a loaf pan, you’ll find an easy method for crafting this delightful dessert at home, perfect for impressing friends at your next gathering or treating yourself to something special!
Ingredients for Burnt Basque Cheesecake
Essential ingredients for a perfect cheesecake
Creating a mouthwatering burnt Basque cheesecake starts with the right ingredients. Here’s what you’ll need:
- Cream Cheese: The star of the show. Aim for full-fat, as it offers that silky texture.
- Granulated Sugar: Regular sugar works best for sweetness and caramelization.
- Eggs: Large eggs provide structure and richness.
- Heavy Cream: This elevates the cheesecake’s creaminess while ensuring it’s not overly dense.
- Vanilla Extract: A splash for warmth and flavor; you can use pure vanilla for the best taste.
- Salt: Just a pinch enhances the sweetness and balances flavors.
Optional: Ingredient substitutes
If you’re missing an ingredient, don’t fret! Here are some convenient substitutes for your burnt Basque cheesecake:
- Cream Cheese: Neufchâtel or mascarpone can work in a pinch.
- Granulated Sugar: Use coconut sugar or honey for a healthier twist.
- Eggs: Ground flaxseeds mixed with water serve as a vegan alternative.
- Heavy Cream: Full-fat coconut milk can provide a dairy-free option.
- Vanilla Extract: Almond extract or a bit of vanilla bean could add a unique flavor profile.
Curious about how different ingredients affect flavor? Check out Serious Eats for deeper insights into baking science.
Preparing Burnt Basque Cheesecake
When you think of dessert that not only looks striking but also delights the palate, the Burnt Basque Cheesecake definitely fits the bill. This unique cheesecake is known for its alluring caramelized exterior and creamy inside, making it a favorite among dessert lovers. Below, I’ll guide you through each step of preparing this incredible treat in a loaf pan.
Preheat the oven
First things first – you’ll want to preheat your oven to 400°F (200°C). This high temperature is key to achieving the characteristic burnt look that defines our cheesecake. While the oven warms up, you can focus on preparing the creamy filling. You might be surprised how quickly this whole process goes once you have the temperature set!
Beat the cream cheese and sugar
In a large mixing bowl, combine two 8-ounce packages of cream cheese at room temperature with three-quarters cup of granulated sugar. Using an electric mixer, beat them together on medium speed until the mixture turns smooth and creamy, with no lumps. This step is essential because a smooth base ensures an even texture throughout your burnt basque cheesecake. Pro tip: Letting the cream cheese sit out for about 30 minutes before mixing helps achieve that smooth consistency much easier!
Incorporate the egg
Once your cream cheese and sugar are well combined, it’s time to add in three large eggs. Add them one at a time, mixing on low speed until just incorporated after each addition. The goal here is to keep the mixture as airy as possible while ensuring everything is well blended. Remember, the eggs play a crucial role in the cheesecake’s structure, so don’t rush this step. For a little flair, consider experimenting with different egg sizes, but keep in mind that large eggs yield the best outcomes.
Mix in the heavy cream and vanilla extract
Next up, add one cup of heavy cream and one teaspoon of pure vanilla extract into the mixture. Blend it all together until you achieve a silky-smooth mixture. The heavy cream provides that luscious and rich mouthfeel that makes this cheesecake irresistible! Feel free to check out some sources about the benefits of using heavy cream for desserts here Healthline if you’re curious.
Fold in the flour and salt
This step is crucial for giving your cheesecake the right balance of texture. Carefully fold in two tablespoons of all-purpose flour and a pinch of sea salt using a spatula. Be gentle here; you want to maintain the airiness you’ve created while still ensuring everything is evenly distributed. Proper folding helps prevent any lumps in the batter, giving you that smooth, decadent result you’re after.
Pour the batter and bake
Now that you have your rich batter ready, pour it into a prepared loaf pan lined with parchment paper. Make sure the batter is level for an even bake. Bake your burnt basque cheesecake in your preheated oven for about 25 to 30 minutes, or until the top is beautifully browned and the center is still a little jiggly. Every oven is different, so keep an eye on it toward the end. The contrast between the burnt top and the creamy interior is part of what makes this dessert so special!
Cool and chill
After your cheesecake has finished baking, remove it from the oven and let it cool in the pan for about 10 minutes. This helps set the texture. Once slightly cooled, transfer it to the refrigerator and chill for at least four hours, or overnight if time allows. The chilling process enhances the flavor and texture even more — plus, it’s the perfect way to prepare ahead for a gathering!
If you find yourself engrossed in the process or have ideas to personalize your burnt basque cheesecake, don’t hesitate to experiment! There’s no one right way — enjoy the journey of making this delightful dessert.
Variations on Burnt Basque Cheesecake
Creating a burnt Basque cheesecake in a loaf pan is just the beginning! The beauty of this dessert lies in its versatility, allowing you to customize it with flavors and ingredients that suit your taste. Let’s dive into some exciting variations.
Adding flavors: citrus zest and spices
Want to elevate your burnt Basque cheesecake? Adding citrus zest, like lemon or orange, can provide a refreshing brightness. Just a teaspoon of finely grated zest mixed into the batter imparts a lovely aroma and flavor that balances the creaminess.
If you’re a fan of warm, comforting flavors, consider spices like cinnamon or nutmeg. A pinch will add depth and a hint of warmth, making it perfect for cozy gatherings. Remember, the secret is to start small; you can always increase the amount to suit your palate.
Swapping ingredients for dietary needs
We all have different dietary preferences, and that shouldn’t keep anyone from enjoying this delectable dessert. If you’re looking to make a dairy-free burnt Basque cheesecake, substitute cream cheese with a plant-based alternative like cashew cream or coconut cream.
For those watching their sugar intake, consider using natural sweeteners such as maple syrup or agave nectar, which can work beautifully in this recipe. In a pinch for eggs? Flax eggs, made by mixing ground flaxseeds with water, can be a suitable substitute.
Whichever route you choose, be sure to check out resources like Healthline for more tips on dietary substitutions that can make your baking both delicious and accommodating.
Embrace these variations, and you’ll find that every loaf of burnt Basque cheesecake can be a reflection of your unique style!
Cooking Tips and Notes for Burnt Basque Cheesecake
Common Pitfalls to Avoid
When making a burnt Basque cheesecake, some pitfalls can trip you up. Be cautious with oven temperatures; using a convection oven may lead to uneven cooking. Make sure your cream cheese is at room temperature for easy mixing, avoiding lumps in your batter. Lastly, resist the urge to overmix the batter. A few lumps are okay—this cheesecake is about that cozy, rustic vibe!
How to Achieve That Perfect Burnt Top
The allure of a burnt Basque cheesecake lies in its contrasting textures and flavors. For the perfect burnt top, preheat your oven well and bake until the surface is a deep caramel color. Trust your instincts! The cheesecake will puff up and then sink as it cools, creating that signature look. If you’re uncertain, check out resources like Serious Eats for expert advice.
With these tips in mind, you’ll be well on your way to impressing friends and family with your very own burnt Basque cheesecake! Happy baking!

Serving suggestions for Burnt Basque Cheesecake
Creative toppings to enhance flavor
Elevate your burnt basque cheesecake experience with delightful toppings that complement its creamy texture and caramelized crust. Consider drizzling honey or a homemade berry compote for a burst of fruitiness. Fresh berries, like strawberries or raspberries, provide a tart contrast that balances the sweetness beautifully. For a bit of crunch, sprinkle crushed nuts such as pistachios or hazelnuts for added texture. You could even experiment with vibrant citrus zest—lemon or orange—to brighten up every bite.
Pairing ideas for enjoyable dessert experiences
Pairing your burnt basque cheesecake with the right accompaniments can transform a simple dessert into a memorable experience. Serve it alongside a rich cup of coffee or a soothing herbal tea to enhance its flavors. If you’re in the mood for a snack, consider some dark chocolate or a slice of light, fruity cake. These combinations cater to diverse palates and can keep the conversation flowing at any gathering. Feeling adventurous? Try pairing it with a refreshing fruit salad that adds a palate-cleansing finish to your meal!
For more tips on enhancing your dessert ideas, check out BBC Good Food and New York Times Cooking for inspiration.
Time Breakdown for Burnt Basque Cheesecake
When it comes to baking the burnt basque cheesecake, knowing the timing can make or break your experience in the kitchen. Here’s a simple breakdown to keep you on track!
Preparation Time
Expect to spend around 20-30 minutes prepping your ingredients. This includes gathering your cream cheese, eggs, sugar, and that essential touch of vanilla. No need to rush; it’s all about creating a relaxed and inviting atmosphere.
Baking Time
The baking process typically takes about 40-50 minutes. Keep an eye on it during those last few minutes when the edges darken beautifully—this will create that iconic burnt top that makes this dessert so unique!
Chilling Time
Once it’s out of the oven, allow your cheesecake to cool for at least 2 hours at room temperature. After that, pop it in the fridge for another 4 hours to truly let the flavors meld, which is essential for that rich taste.
Total Time
In total, you’ll be looking at approximately 6-7 hours before it’s ready to slice into and serve. Patience is key, but trust me, the result is absolutely worth it!
For a deeper dive into baking techniques, check out this resource on baking science from Serious Eats to enhance your skills even further.
Nutritional Facts for Burnt Basque Cheesecake
When indulging in a creamy slice of burnt basque cheesecake, it’s helpful to know what you’re treating yourself to nutritionally. Here’s a quick overview per typical serving:
Calories
This delightful dessert typically contains about 300-400 calories. It’s rich and satisfying, so a little goes a long way!
Protein
You can expect approximately 6-8 grams of protein in each slice. The cream cheese provides a creamy base while adding a bit of muscle-building goodness.
Carbohydrates
Each serving offers around 25-30 grams of carbohydrates. Most of these come from sugar, giving this cheesecake its sweet flavor and decadent mouthfeel.
Fats
A serving packs about 20-25 grams of fat. Most come from the cream cheese and heavy cream, making it delectably rich.
For further details about your dietary choices, you can explore resources like the USDA FoodData Central or NutritionData. Enjoy your cheesecake with mindful moderation!
FAQs about Burnt Basque Cheesecake
Why is it called “burnt” Basque cheesecake?
The term “burnt” in burnt Basque cheesecake comes from its distinctive dark, caramelized top. This deep color is a result of high-temperature baking, which creates a beautifully charred crust. Don’t worry; this isn’t a sign of a dessert gone wrong! Instead, this unique feature contributes to the rich flavor and creamy texture inside. The juxtaposition between the light interior and the darker exterior makes it an eye-catching dessert that’s as delicious as it is impressive. Plus, the slight bitterness of the burnt crust pairs perfectly with the rich sweetness of the cheesecake.
Can I make it ahead of time?
Absolutely! Burnt Basque cheesecake is actually great for making ahead. You can prepare it a day or two in advance, which is perfect for busy schedules or when you have guests over. Just make sure to let it cool completely before storing it in the refrigerator. Planning ahead might just set you up for a dessert that wows your friends and family, plus saves you some time on the day of your gathering.
How do I store leftover cheesecake?
Storing leftover cheesecake is a breeze! Simply cover it tightly with plastic wrap or transfer it to an airtight container. You can keep it in the refrigerator for up to four days. If you want to enjoy it even later, you can freeze portions. Just remember to wrap it well before placing it in a freezer-safe container. Thaw it overnight in the fridge when you’re ready to indulge again.
Feel free to share your burnt Basque cheesecake experiences with us, and check out more tips here and there for further baking inspiration!
Conclusion on Burnt Basque Cheesecake
Recap of the Cheesecake Journey
As we wrap up our burnt basque cheesecake adventure, it’s clear this dessert is anything but ordinary. From its unique caramelized top to the rich, creamy interior, this cheesecake offers a delightful contrast of textures and flavors. The journey of mixing simple ingredients, patiently baking, and finally indulging in a slice is truly worthwhile.
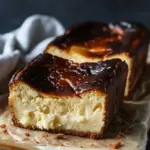
Remember, using a loaf pan adds a twist to the classic shape, making it perfect for sharing—or keeping all to yourself! Whether it’s for a weekend treat or a special celebration, this cheesecake will surely impress. Enjoy your baking and experimentation!
For those curious about baking tips, consider checking out resources from Serious Eats or BBC Good Food for more culinary inspiration.
PrintBurnt Basque Cheesecake in a Loaf Pan: An Easy Indulgence
This Burnt Basque Cheesecake in a Loaf Pan is a delightful and simple dessert that brings indulgence to your table.
- Prep Time: 15 minutes
- Cook Time: 45 minutes
- Total Time: 1 hour
- Yield: 8 servings
- Category: Dessert
- Method: Baking
- Cuisine: Spanish
- Diet: Vegetarian
Ingredients
- 1 cream cheese
- 1 cup heavy cream
- 3/4 cup granulated sugar
- 3 large eggs
- 1 tablespoon all-purpose flour
- 1 teaspoon vanilla extract
Instructions
- Preheat your oven to 400°F (200°C).
- In a mixing bowl, beat the cream cheese until smooth.
- Add in heavy cream and sugar, and mix until well combined.
- Incorporate the eggs one at a time, followed by flour and vanilla extract.
- Pour the mixture into a lined loaf pan.
- Bake for 40-45 minutes until the top is well browned.
- Allow to cool before serving.
Notes
- For a richer flavor, let the cheesecake sit for a few hours before serving.
- Pair it with fresh berries for added flavor.
Nutrition
- Serving Size: 1 slice
- Calories: 300
- Sugar: 20g
- Sodium: 200mg
- Fat: 22g
- Saturated Fat: 13g
- Unsaturated Fat: 9g
- Trans Fat: 0g
- Carbohydrates: 25g
- Fiber: 0g
- Protein: 5g
- Cholesterol: 90mg