Introduction to Mini Cheesecake Cups
Mini cheesecake cups are one of those delightful treats that bring together the ease of preparation with a satisfying explosion of flavor. If you’ve ever tried a traditional cheesecake but found it to be a bit cumbersome to make or serve, then these mini versions are for you! They combine all the creamy goodness of a classic cheesecake and fit perfectly into your hand; a win-win for everyone at the party.
Why Mini Cheesecake Cups Are the Perfect Homemade Treat?
First and foremost, let’s talk about versatility. Whether you’re going for a classic flavor like New York-style, or something a little more adventurous, like chocolate hazelnut or fruit-infused options, mini cheesecake cups allow you to explore endless flavors without the guilt of committing to a full-sized cheesecake. You can easily customize them for each guest’s palate, impressing everyone without the exertion of making multiple desserts!
Additionally, they are perfect for gatherings and parties. Have you ever tried to serve a slice of cheesecake at a picnic or outdoor gathering? The effort often outweighs the enjoyment. With mini cheesecake cups, you eliminate that struggle. They’re portable, easy to serve, and can be topped with fresh fruits, chocolate, or even turkey bacon for a savory twist. You simply grab and enjoy!
Another treat this dessert offers is the fun of assembly. Making mini cheesecake cups can be a great activity to enjoy with friends or family. Everyone can get involved, crush cookies for the crust, and add their favorite toppings, making it a delightful bonding experience.
According to the American Baker’s Association, dessert trends lean heavily toward bite-sized options, and mini cheesecake cups fit this bill beautifully. Plus, they’re typically easier to make and require less time rigorously watching over your oven. This gives you more time to kick back and enjoy your guests.
For a baking adventure that aligns with your busy lifestyle, mini cheesecake cups may just be the perfect solution. So roll up those sleeves and create some mouthwatering bites that everyone will love. If you’re interested in getting started, check out this helpful guide on dessert trends to inspire you even more!
Ingredients for Mini Cheesecake Cups
Creating scrumptious mini cheesecake cups is easier than you think! Let’s break it down into three delicious components: the crust, the filling, and the toppings.
Crust Ingredients
For the perfect base, you’ll need:
- Graham cracker crumbs: 1 ½ cups for that classic flavor.
- Sugar: Just 2 tablespoons to add a touch of sweetness.
- Butter: 1/3 cup, melted—this will hold everything together.
Did you know that graham crackers originated in the 19th century as a way to promote a health-conscious diet? Learn more here.
Cheesecake Filling Ingredients
The heart of your mini cheesecakes includes:
- Cream cheese: 2 packs (8 oz each), softened for a smooth texture.
- Sour cream: 1 cup for extra creaminess.
- Sugar: ¾ cup to sweeten the mix.
- Vanilla extract: 1 teaspoon will brighten the flavor.
- Eggs: 2 large, for that perfect custardy consistency.
Topping Ingredients
Finish off those mini cheesecake cups with:
- Whipped cream: For a fluffy topping, about 1 cup.
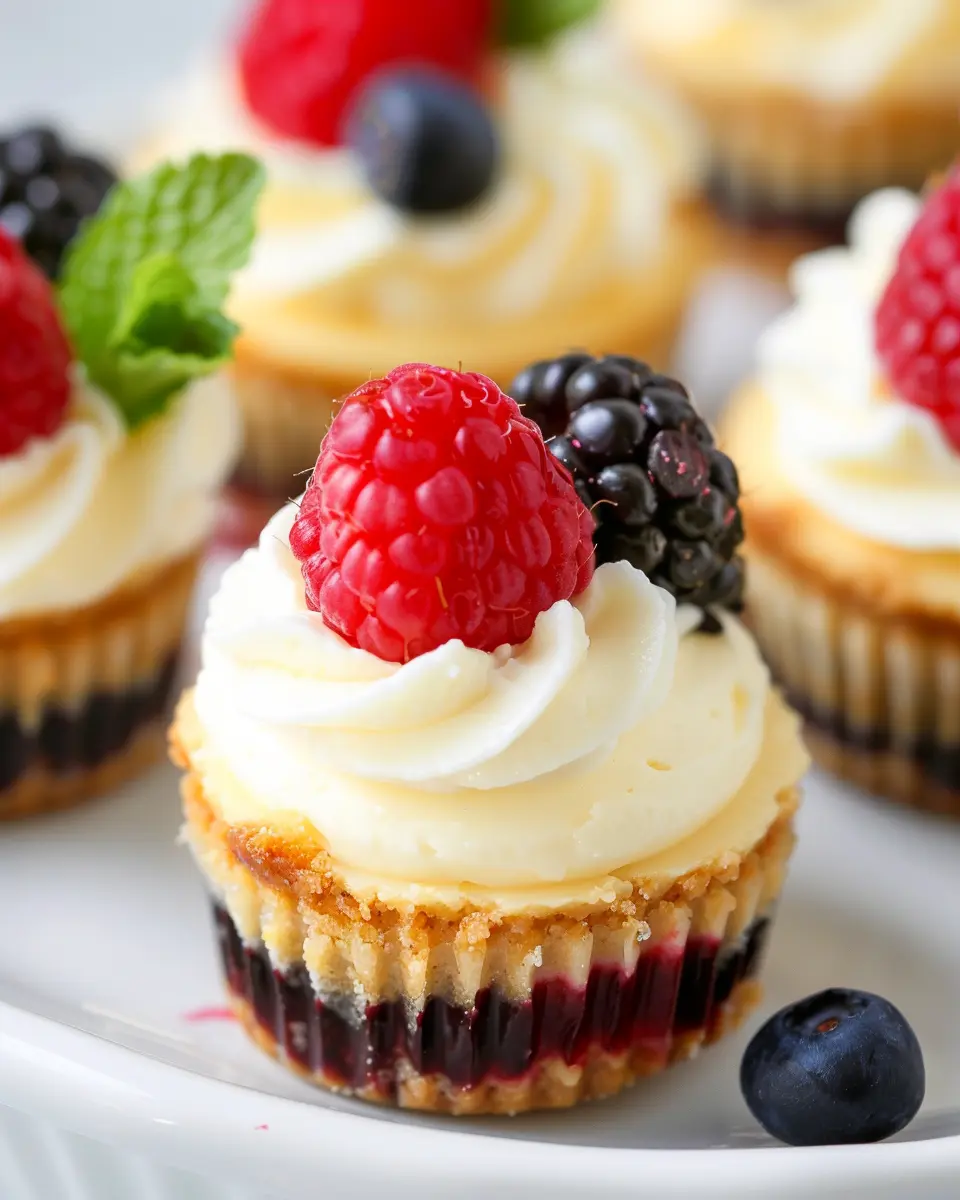
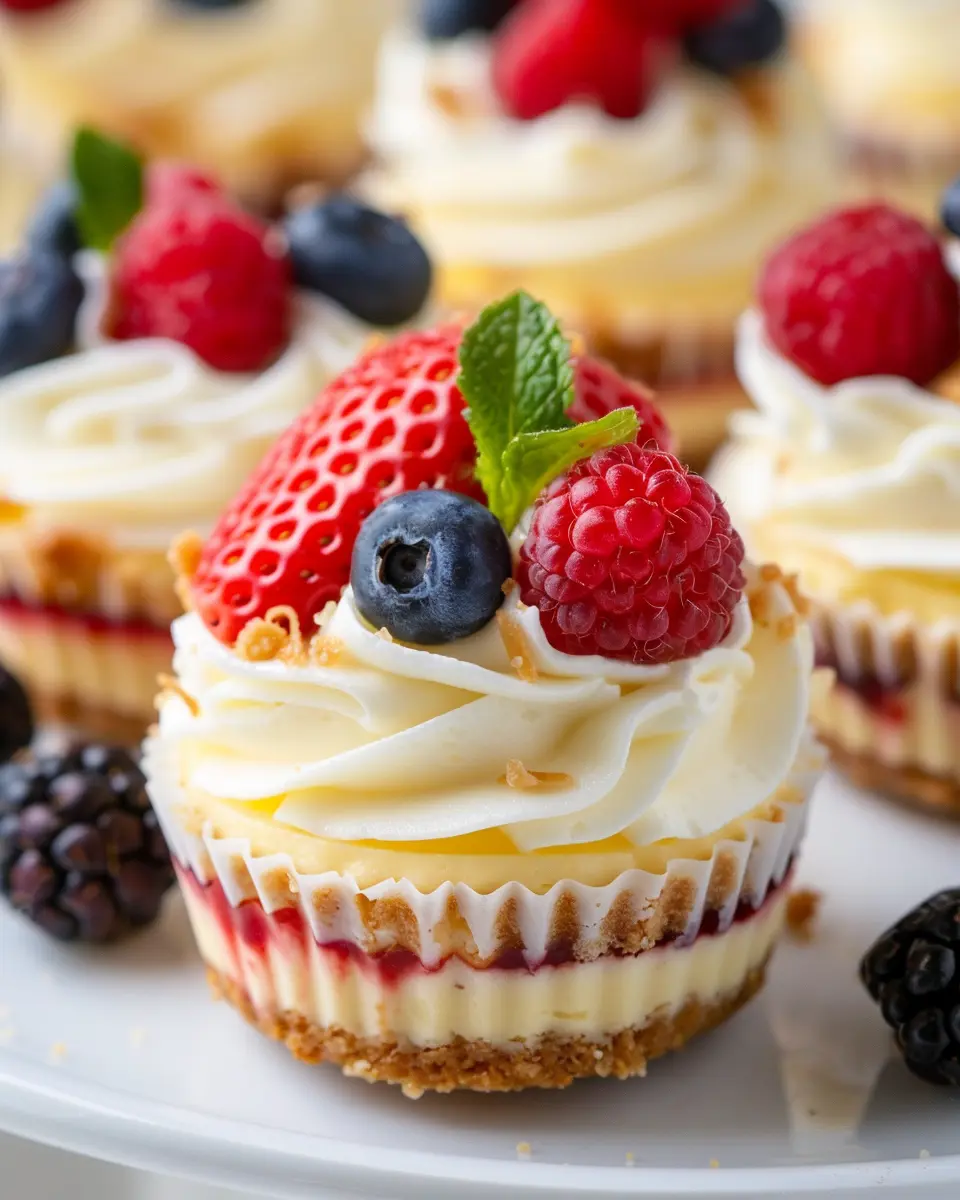
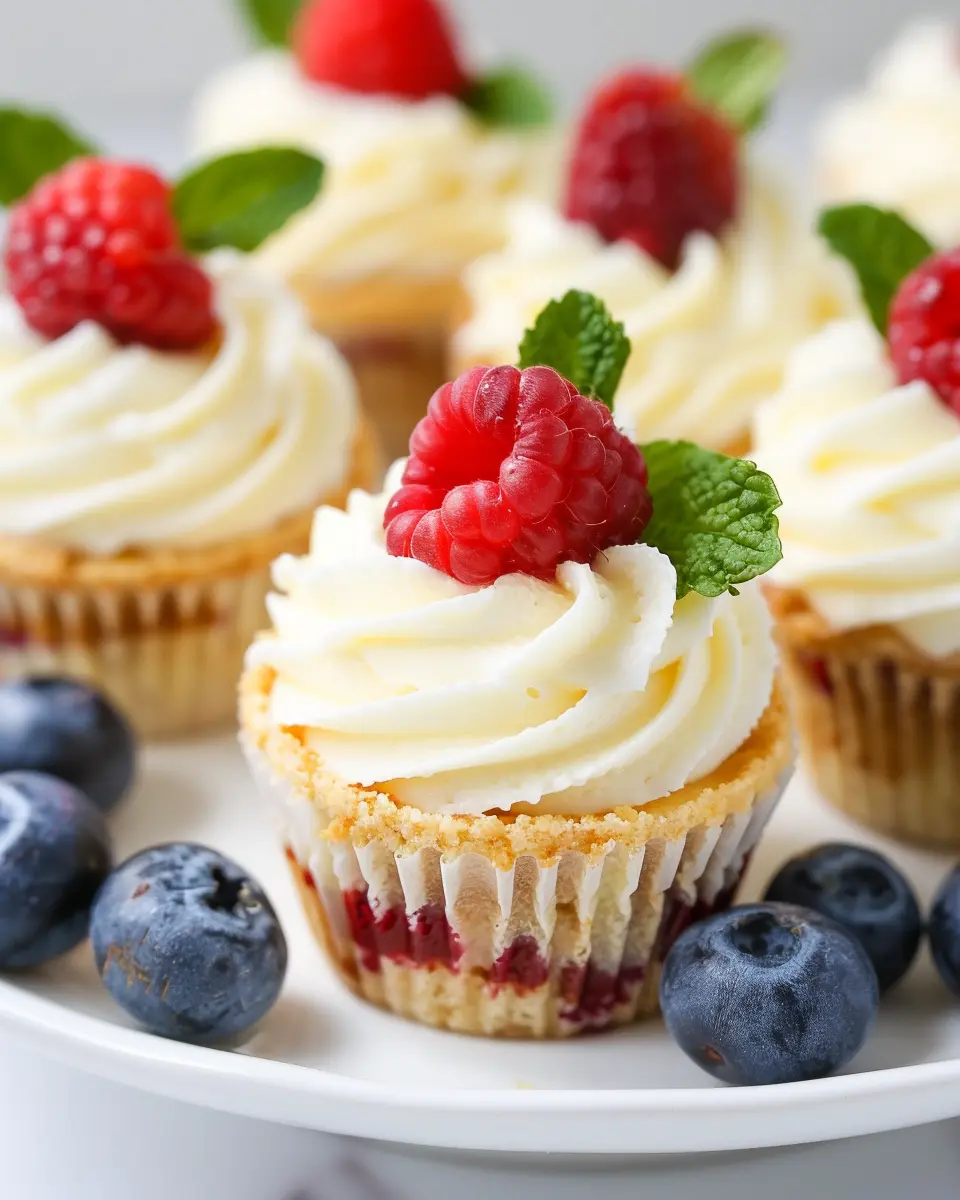
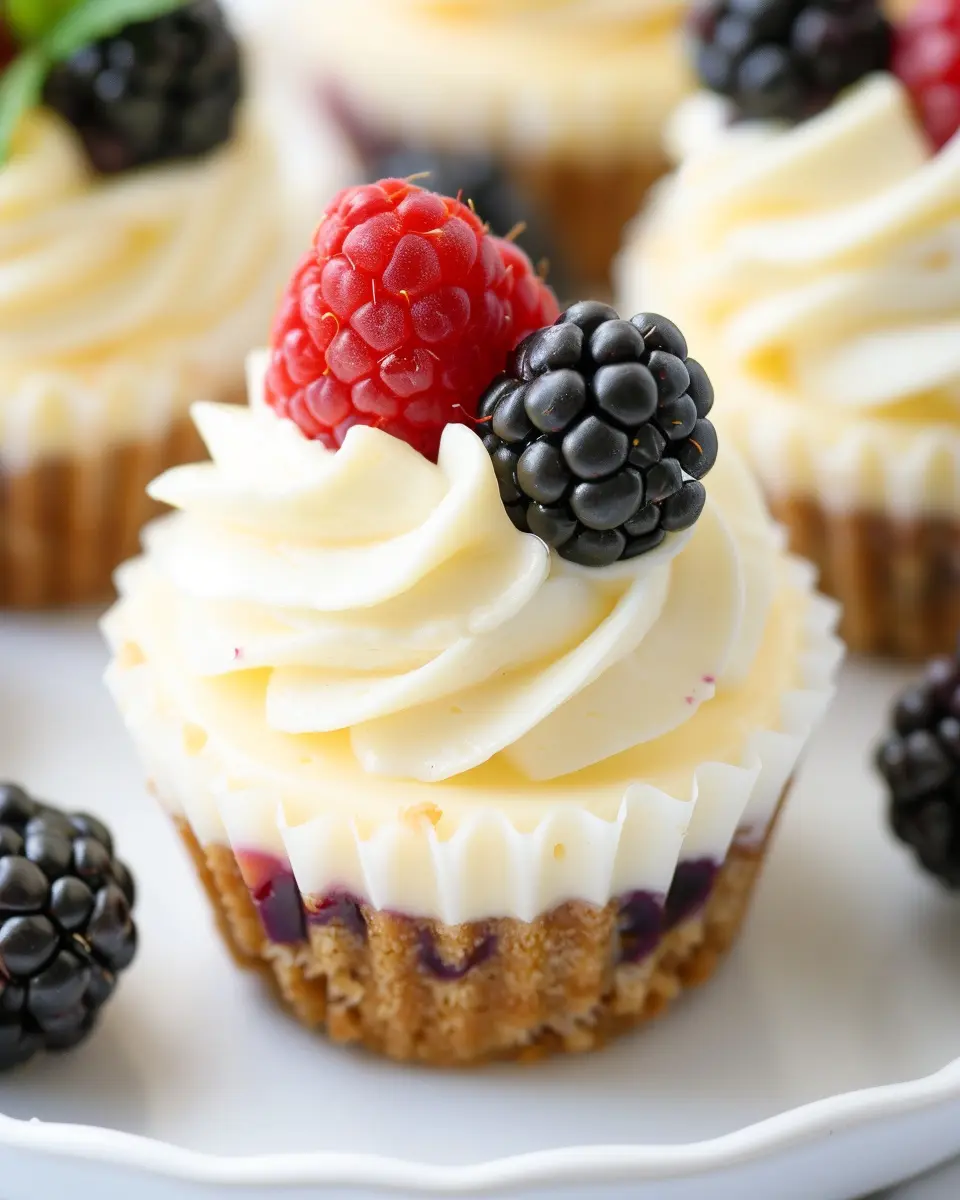
- Fresh fruit: Berries like strawberries or blueberries add a pop of color and flavor.
- Chocolate shavings or caramel sauce: Optional extras for a decadent touch.
Once you have these ingredients ready, you’re well on your way to impressing friends and family with delightful mini cheesecake cups! Ready to get baking?
Preparing Mini Cheesecake Cups
Mini cheesecakes are the perfect dessert for any occasion! They’re adorable, easy to serve, and they pack a delicious punch. Making mini cheesecake cups is a fun and rewarding kitchen project that anyone can master, whether you’re a beginner or a seasoned pro. Let’s get started with this step-by-step guide.
Preheat the oven and prepare the muffin pan
First things first, let’s get that oven ready. Preheating to 325°F (160°C) ensures that your mini cheesecake cups bake evenly, giving them a perfect consistency. While the oven is heating up, prepare your muffin pan.
- Line with cupcake liners: For easy removal and to keep the crust intact, consider using paper liners.
- Lightly grease: Even if you’re using liners, it’s a good idea to lightly coat them with a non-stick spray or brush with melted butter. This extra step will help prevent any sticking.
Getting your equipment prepped now means less hassle later, so take a moment to enjoy the process!
Make the crust
Next, let’s whip up the delicious crust that will give your mini cheesecakes their delightful crunch. The classic choice is a graham cracker crust, but feel free to experiment if you’re in the mood!
Here’s what you need:
- 1 cup graham cracker crumbs
- 1/4 cup sugar
- 1/2 cup melted butter
Instructions:
- In a mixing bowl, combine the graham cracker crumbs and sugar.
- Pour in the melted butter and mix until the crumbs are evenly coated and resemble wet sand.
- Scoop about a tablespoon of the mixture into each muffin cup and press it down firmly to form the crust.
Using a flat-bottomed object, like a glass, can help you pack it down nicely. Remember, the more compact the crust, the better it will hold up!
Create the cheesecake batter
Once your crust is in place, let’s dive into the creamy cheesecake layer. The beauty of making mini cheesecake cups is that you can whip up this batter in no time!
You’ll need:
- 8 oz cream cheese, softened
- 1/2 cup sugar
- 1 teaspoon vanilla extract
- 2 large eggs
- 1/4 cup sour cream (optional for extra creaminess)
How to do it:
- In a mixing bowl, beat the softened cream cheese until smooth using an electric mixer or a whisk.
- Gradually add the sugar and vanilla, mixing until combined.
- Beat in the eggs, one at a time, until just incorporated. Avoid overmixing.
- If you prefer a richer texture, mix in the sour cream at the end.
This batter is where you can get creative! Want to add lemon zest or chocolate chips? Go for it!
Fill the cups with cheesecake batter
Now that you have your fantastic cheesecake batter ready, it’s time to pour it into your crusts.
- Using a spoon or cookie scoop, fill each muffin cup to about 3/4 full. This allows for some expansion during baking without overflowing.
- For those feeling adventurous, you could even swirl in some fruit puree or chocolate before baking for added flair!
Bake the mini cheesecakes
Time to pop those beauties in the oven!
- Place the muffin pan on the center rack and bake for 18-20 minutes. The cheesecakes should be set around the edges but still slightly jiggly in the center.
- Turn off the oven and leave the door ajar. Let the cheesecakes cool inside for about 30 minutes. This gentle cooling helps prevent cracking.
Once cool, transfer them to the fridge and let them chill for at least 2 hours, or overnight if you can wait that long. The result? Silky-smooth mini cheesecake cups bursting with flavor!
Enjoy your mini cheesecakes plain, or get fun with toppings—fresh fruits, whipped cream, or drizzles of chocolate sauce will elevate your dessert game even further. Happy baking!
Variations on Mini Cheesecake Cups
Mini cheesecake cups are a versatile treat that can be tailored to suit any occasion or taste. Here are some mouth-watering variations that will elevate your dessert game!
Decadent Chocolate Mini Cheesecake Cups
For the chocolate lovers out there, these chocolate mini cheesecake cups are a must-try. Simply incorporate cocoa powder into the cream cheese mixture for a rich, chocolatey base. For an extra indulgent twist, drizzle melted chocolate over the top and garnish with chocolate shavings. You can even experiment with adding a splash of espresso for that delightful mocha flavor. Pair them with a strong cup of coffee for a perfect dessert pairing. A comforting chocolate minicheesecake will satisfy cravings and impress your guests!
Fresh and Fruity Topped Mini Cheesecake Cups
If you prefer a lighter dessert, consider fruit-topped mini cheesecake cups. Fresh berries, such as strawberries, blueberries, or raspberries, add a burst of color and flavor. Simply layer a mixture of cream cheese, powdered sugar, and vanilla extract, then top it off with your favorite fruits. For a tropical twist, mango or sliced kiwi can be delightful as well. Drizzle with a homemade fruit compote or a hint of honey for added sweetness. Trust me, the vibrant flavors will have you dreaming of summer!
Irresistibly Swirled Mini Cheesecake Cups
Get creative with swirled mini cheesecake cups by adding a dash of flavor to each cup. Consider swirling in peanut butter, caramel, or even Nutella into the cheesecake batter before baking. This creates an inviting marbled appearance and a delicious fusion of flavors that will have everyone going back for seconds. The beauty of this variation lies in its endless possibilities—experiment with your favorite flavors to make it uniquely yours!
Incorporating these variations into your mini cheesecake cups is a wonderful way to impress guests at any gathering. For more tips on creating delicious desserts, check out resources from The Spruce Eats or Epicurious. Happy baking!
Baking notes for Mini Cheesecake Cups
Tips for a perfect crust
To achieve a delightful crust for your mini cheesecake cups, use graham cracker crumbs or digestive biscuits for optimal flavor and texture. Ensure your butter is melted but not hot; this helps bind the crumbs without cooking them. Press the mixture firmly into your cups for a sturdy base.
Common mistakes to avoid
When making mini cheesecake cups, avoid overmixing your cream cheese to prevent air bubbles, which can crack your cheesecakes. Also, be cautious not to overbake; the centers should remain slightly jiggly as they will firm up while cooling. Using a water bath can also help create a creamy texture and prevent cracks.
Cooling and chilling tips
Once baked, allow your mini cheesecake cups to cool in the pan for about 15 minutes before transferring them to the refrigerator. This prevents condensation from forming. Chill for at least two hours, or overnight for the best flavor.
For more baking resources, check out King Arthur Baking or America’s Test Kitchen for tips and techniques to refine your dessert game!
Serving suggestions for Mini Cheesecake Cups
Presentation Ideas
When it comes to elevating your mini cheesecake cups, presentation is key. These delightful treats can shine at any gathering with just a little creativity. Consider using clear cups or jars to showcase the beautiful layers of cheesecake and toppings. A sprinkle of crushed graham crackers on top can mimic the traditional crust, while a fresh berry on each cup adds a pop of color. For a fun twist, serve your mini cheesecake cups on a rustic wooden board, accompanied by dessert forks for a charming touch. You can even build a themed dessert table, mixing in other sweets like fruit tarts or chocolate mousse for variety.
Pairings with Dessert Toppings
Topping options for your mini cheesecake cups are virtually limitless! Classic choices include:
- Fresh Fruit: Strawberries, blueberries, and raspberries are crowd-pleasers.
- Chocolate Ganache: A rich chocolate drizzle adds decadence.
- Caramel Sauce: Drizzling caramel brings a sweet, buttery flavor that pairs perfectly.
- Whipped Cream: Light and airy whipped cream offers a delightful contrast to the creamy cheesecake.
Why not experiment with your favorite flavors? You could also try adding a dollop of peanut butter or a sprinkle of cinnamon for a unique twist. If you’re serving guests, why not set up a topping bar? This way, everyone can customize their mini cheesecake cups to their liking.
For more inspiration on dessert pairings, check out The Kitchn for their expert ideas. Enjoy creating delicious memories!
Time details for Mini Cheesecake Cups
Preparation time
Making your delightful mini cheesecake cups doesn’t take long! You’ll need about 20 minutes to gather your ingredients and whip up the filling. Ensure everything is measured and ready to go for the smoothest process.
Baking time
Once prepped, these little gems need about 15 minutes in the oven. This brief baking period ensures they firm up just right without losing that creamy texture we all love. Keep an eye on them!
Chilling time
Finally, the chilling phase is crucial for perfecting your mini cheesecake cups. Allow them to rest in the fridge for at least 3 hours, but overnight is even better! This waiting allows the flavors to meld beautifully, giving you an irresistible treat. Patience pays off!
For additional tips on cheesecake variations, check out The Cheesecake Factory’s expert insights.
Nutritional information for Mini Cheesecake Cups
When it comes to enjoying dessert without the guilt, these mini cheesecake cups strike a delightful balance. To give you a clearer picture of what you’re indulging in, here’s the nutritional breakdown:
Calories
Each mini cheesecake cup contains approximately 150 calories, making it a satisfying yet manageable treat! This indulgence won’t derail your healthy eating goals when enjoyed in moderation.
Protein
For a sweet dessert, these mini cheesecake cups offer a nice boost of protein, roughly 4 grams per serving. This is mainly thanks to the cream cheese and Greek yogurt, which help keep you feeling full.
Sugar content
In terms of sweetness, expect around 10 grams of sugar per cup. Although a bit high, you can always adjust the sugar in your recipe if you’re watching your intake. Consider using natural sweeteners like stevia or agave for a healthier option.
If you’re looking for a richer overview of dessert nutrition, check out Healthline for more detailed articles!
FAQs about Mini Cheesecake Cups
Can I use low-fat cream cheese in these mini cheesecakes?
Absolutely! Using low-fat cream cheese in your mini cheesecake cups can be a healthier alternative without sacrificing flavor. Just keep in mind that the texture may be slightly different. The result will still be creamy and delicious, but may not be as rich as traditional cream cheese. For the creamiest outcome, consider mixing the low-fat option with a small amount of full-fat cream cheese for balance.
How should I store leftover mini cheesecake cups?
If you find yourself with leftover mini cheesecake cups (which can be hard to believe!), storing them correctly is key to maintaining their deliciousness. Place them in an airtight container and refrigerate. They will stay fresh for up to five days. If you’re keen on keeping them longer, you can freeze them! Just make sure to wrap each cup tightly in plastic wrap and then in aluminum foil. When you’re ready to enjoy them again, let them thaw in the fridge overnight.
Can I make these mini cheesecakes ahead of time?
Yes, making mini cheesecake cups ahead of time is not only possible but highly encouraged! They can be made up to three days in advance. This makes them perfect for gatherings and potlucks. Simply prepare the cups, allow them to set in the refrigerator, and you’ll have a delicious dessert ready to impress your friends. For more tips on prepping and storing desserts, check out resources like Taste of Home for essential storage advice!
The flexibility of these mini cheesecake cups truly enhances their appeal, making them a splendid dessert any time of year!
Conclusion on Mini Cheesecake Cups
Recap of Why These Treats are a Must-Try
In summary, mini cheesecake cups are the perfect bite-sized delights for any occasion. Their creamy texture and customizable flavors make them a fun dessert option that appeals to everyone. Whether you’re hosting a dinner party or just treating yourself after a long week, these little cups deliver big on flavor and satisfaction.
Plus, they’re easy to prepare and can be made in advance, giving you more time to enjoy with friends and family. If you’re in the mood for some inspiration, consider checking out this lovely dessert blog for variations on classic recipes. So why not whip up a batch and see for yourself? You’ll be glad you did!
PrintMini Cheesecake Cups: Easy Indulgence for Every Occasion

These Mini Cheesecake Cups are the perfect bite-sized dessert for any occasion, offering a creamy, rich flavor that everyone will love.
- Prep Time: 15 minutes
- Cook Time: 25 minutes
- Total Time: 2 hours 40 minutes
- Yield: 12 servings
- Category: Dessert
- Method: Baked
- Cuisine: American
- Diet: Vegetarian
Ingredients
- 8 ounces cream cheese
- 1/2 cup granulated sugar
- 1 teaspoon vanilla extract
- 1/4 cup sour cream
- 2 large eggs
- 12 mini graham cracker crusts
- 2 cups fresh berries (for topping)
Instructions
- Preheat the oven to 325°F (163°C).
- In a mixing bowl, beat the cream cheese until smooth.
- Add the sugar and vanilla extract, mixing until well combined.
- Beat in the sour cream and then add the eggs one at a time, mixing well after each addition.
- Place the mini crusts on a baking sheet.
- Pour the cheesecake mixture into each crust, filling them about 3/4 full.
- Bake for 20-25 minutes, or until the centers are set.
- Allow to cool, then refrigerate for at least 2 hours.
- Top with fresh berries before serving.
Notes
- Adjust the sweetness by adding more or less sugar to taste.
- Experiment with different toppings such as chocolate or caramel.
Nutrition
- Serving Size: 1 cheesecake cup
- Calories: 220
- Sugar: 15 grams
- Sodium: 150 milligrams
- Fat: 12 grams
- Saturated Fat: 7 grams
- Unsaturated Fat: 3 grams
- Trans Fat: 0 grams
- Carbohydrates: 25 grams
- Fiber: 1 gram
- Protein: 3 grams
- Cholesterol: 30 milligrams